For this week’s assignment I was thinking about making something that reminds me of the San Francisco beach. I started with the idea of using ocean waves image as displacement map or bump map then create meshes from it. I tried this meth on Maya and Solidworks, but I wasn’t able to convert them to an useful mesh.
https://www.youtube.com/watch?v=QJXbaIwTJYg&list=UUQq4Uj0_3uKKDL20IRIwqQQ
I decided to create the waves in Maya using the soft selection tool. I was able to select vertexes and vertexes around the point to moving the surfaces in or out. I end up with nice looking wavy model.


I can not find a good way to export .stl file from Maya, so I had to enable the .obj export then open and convert the file from MeshLab.
I was trying to smooth out my wave model but accidentally discover the “Random vertex displacement” option along with other options as well. I used it to create a more geomatic shape thinking that the 1/4 end mill would reproduce the shape.


After I did the Random vertex displacement, I saved the model as .stl, then open it in SolidWorks to cut a rounded hole in the middle.


ShopBot-ing
I used the ShopBot to cut my piece. Since the foam depth might not be deep enough, I spread glue 2 pieces of foam together just incase. At 13000 RPM, the rounded end mill was able to cut smoothly without any trouble. The 1/4 inch end mill however did not leave enough resolution for me, but it cuts much faster.

After about 45 minutes, this is the end result.
Molding & Casting
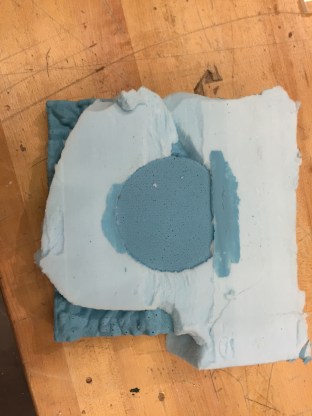
I mixed a large batch of OOMOO at 1 to 1 ratio evenly to make my negative mold. I end up using 1.5 sets of OOMOO to create the negative mold .

1.5 hours later, OOMOO becomes pretty hard. In order to get my negative mold out, I used the air gun to break the edge first, then break the mold apart from the side and the bottom. Since my mold is made up if 2 pieces of foam, I can just break them apart fairly easily.


For casting, I used the laser cutter to cut out the fence, which is 8″X8″. It is a clean and fast way to make the reusable walls. I then pour and clamp the mold to position. I was able to make 2 castes in 3 hours using Drystone. 5 Part Drystone Powder and 1 part water.


Spread Paint
I applied 4 coats of paint, 15 minutes between coats.


Assembling
I placed a piece of laser etched acrylic in the middle, it has a water ripple texture to it. To make the edge more organic I made the edges uneven using a drum stander.


Lighting
I was trying to use the ATtiny44 board that I programed last week for the lighting, using PWN to simulate the ocean wave, but it was too big and I broke the ISP port. I end up using the large LEDs in the lab with a 1.5 battery.


