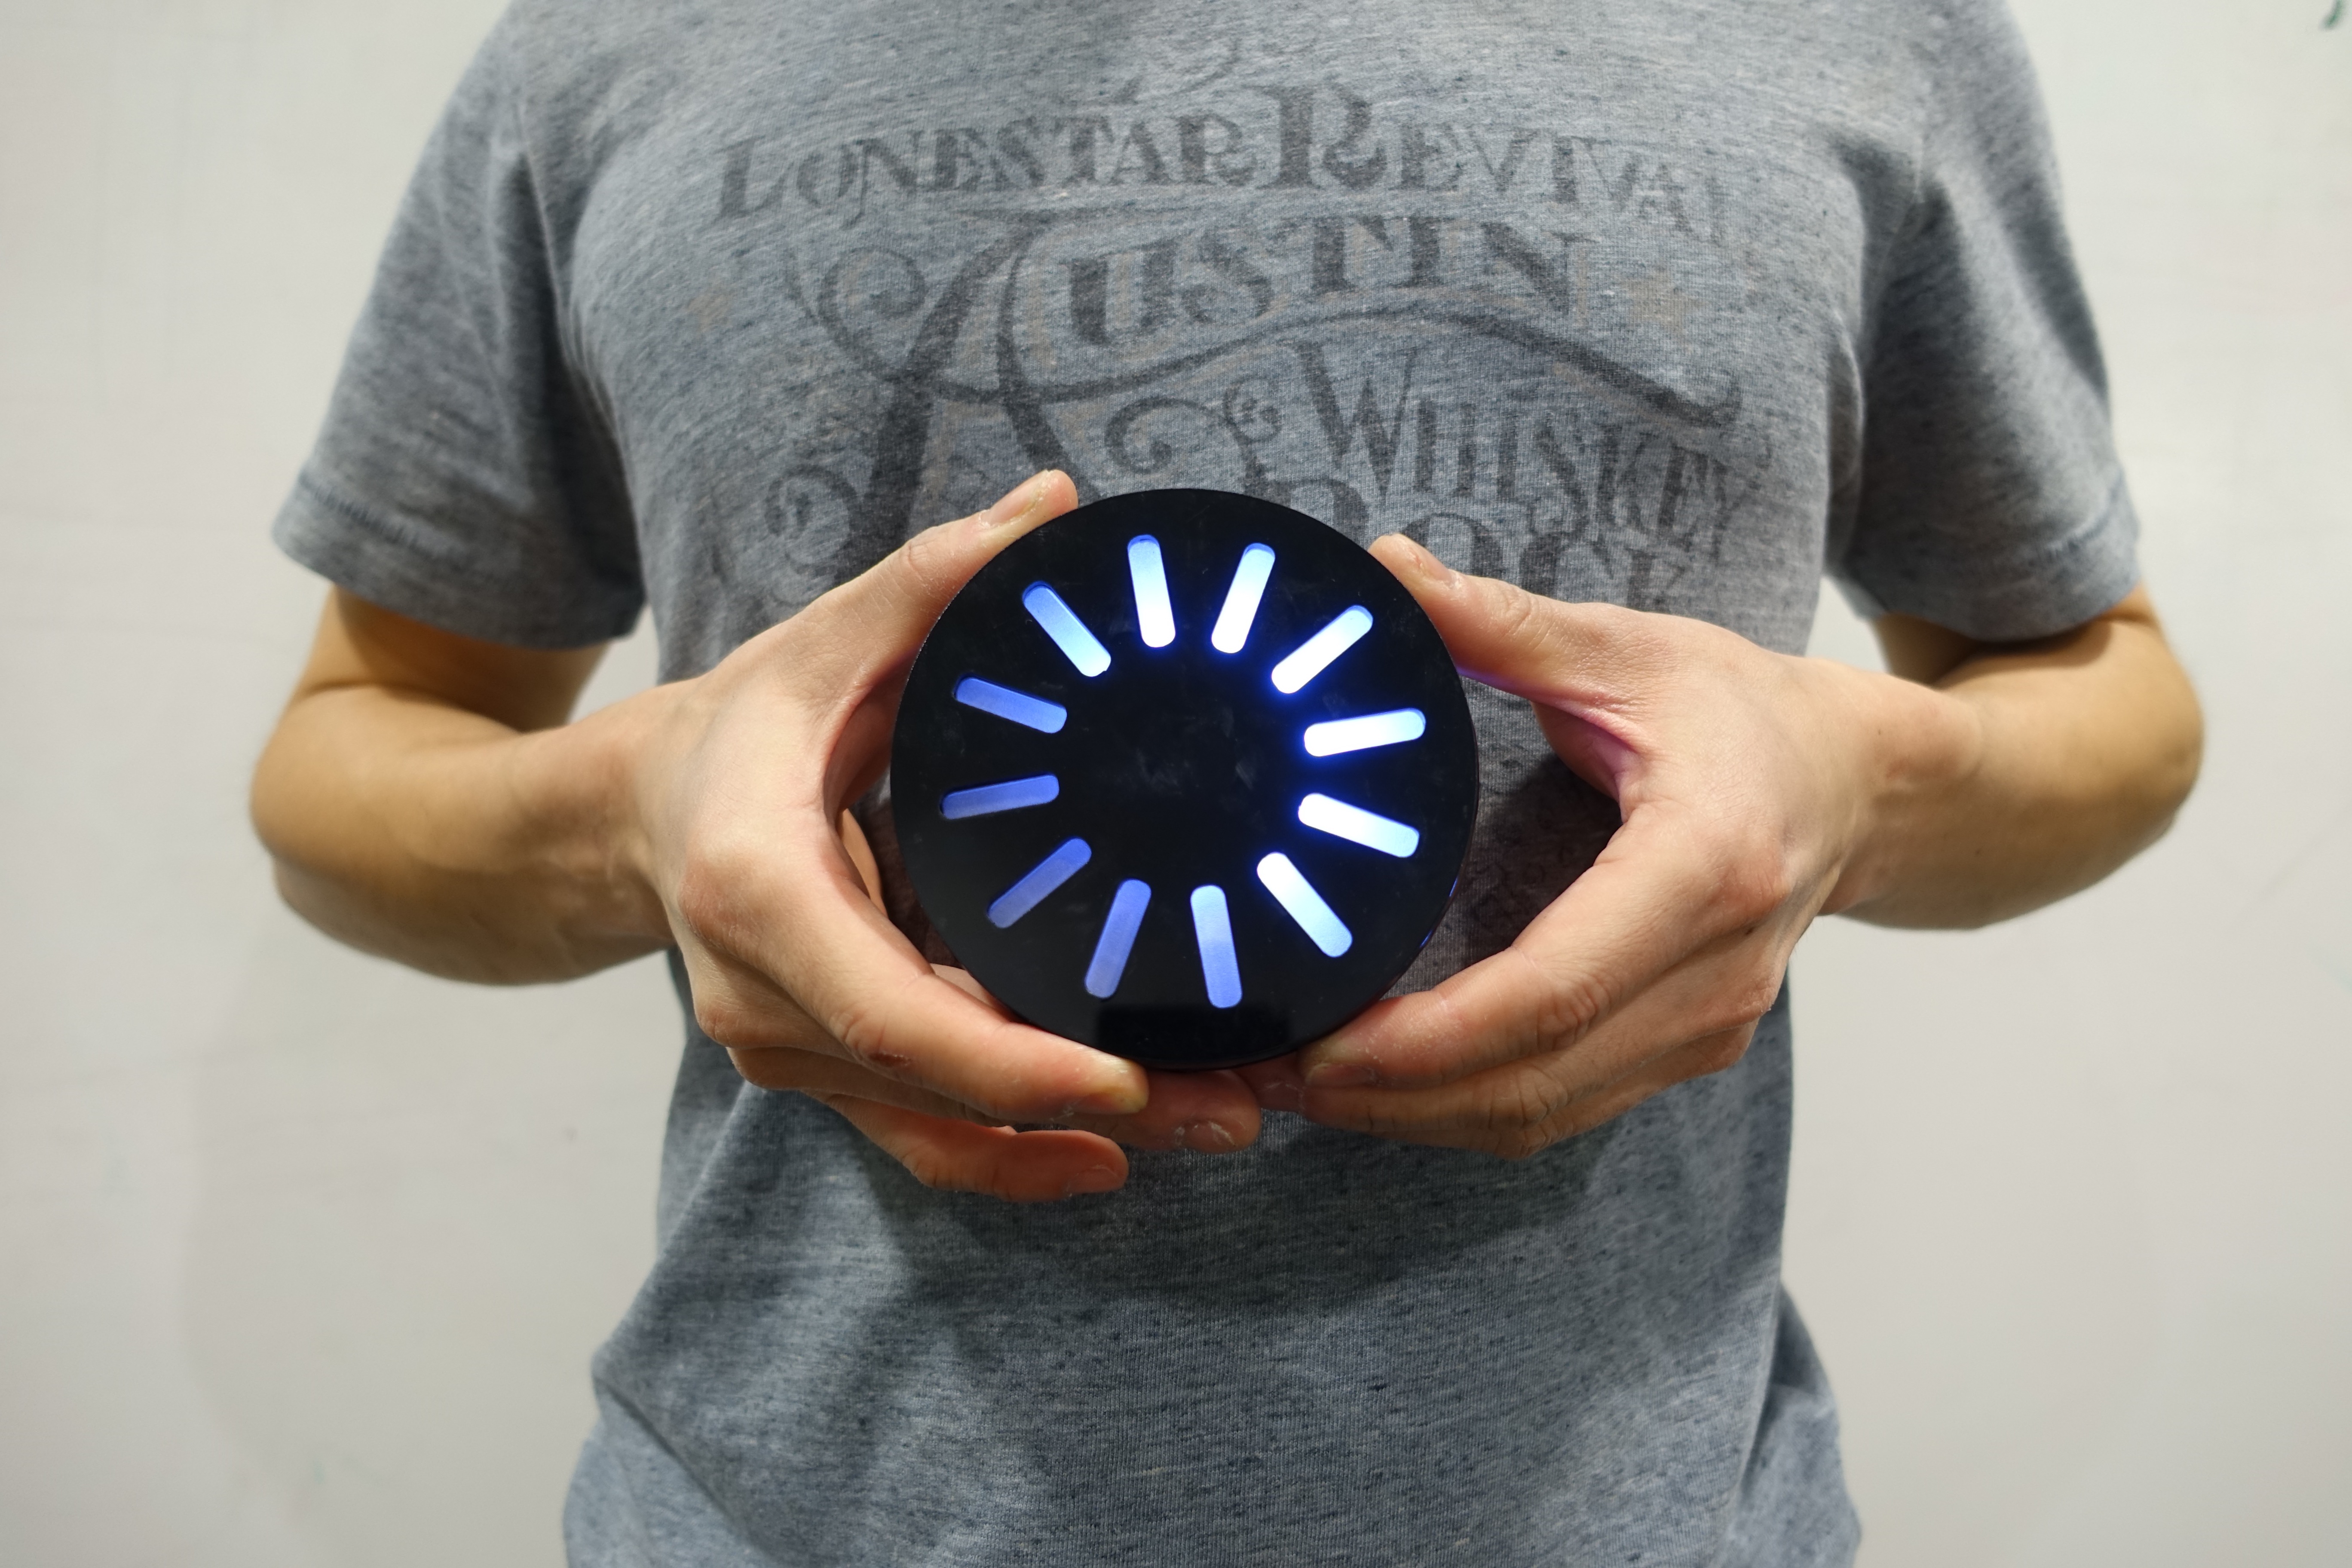
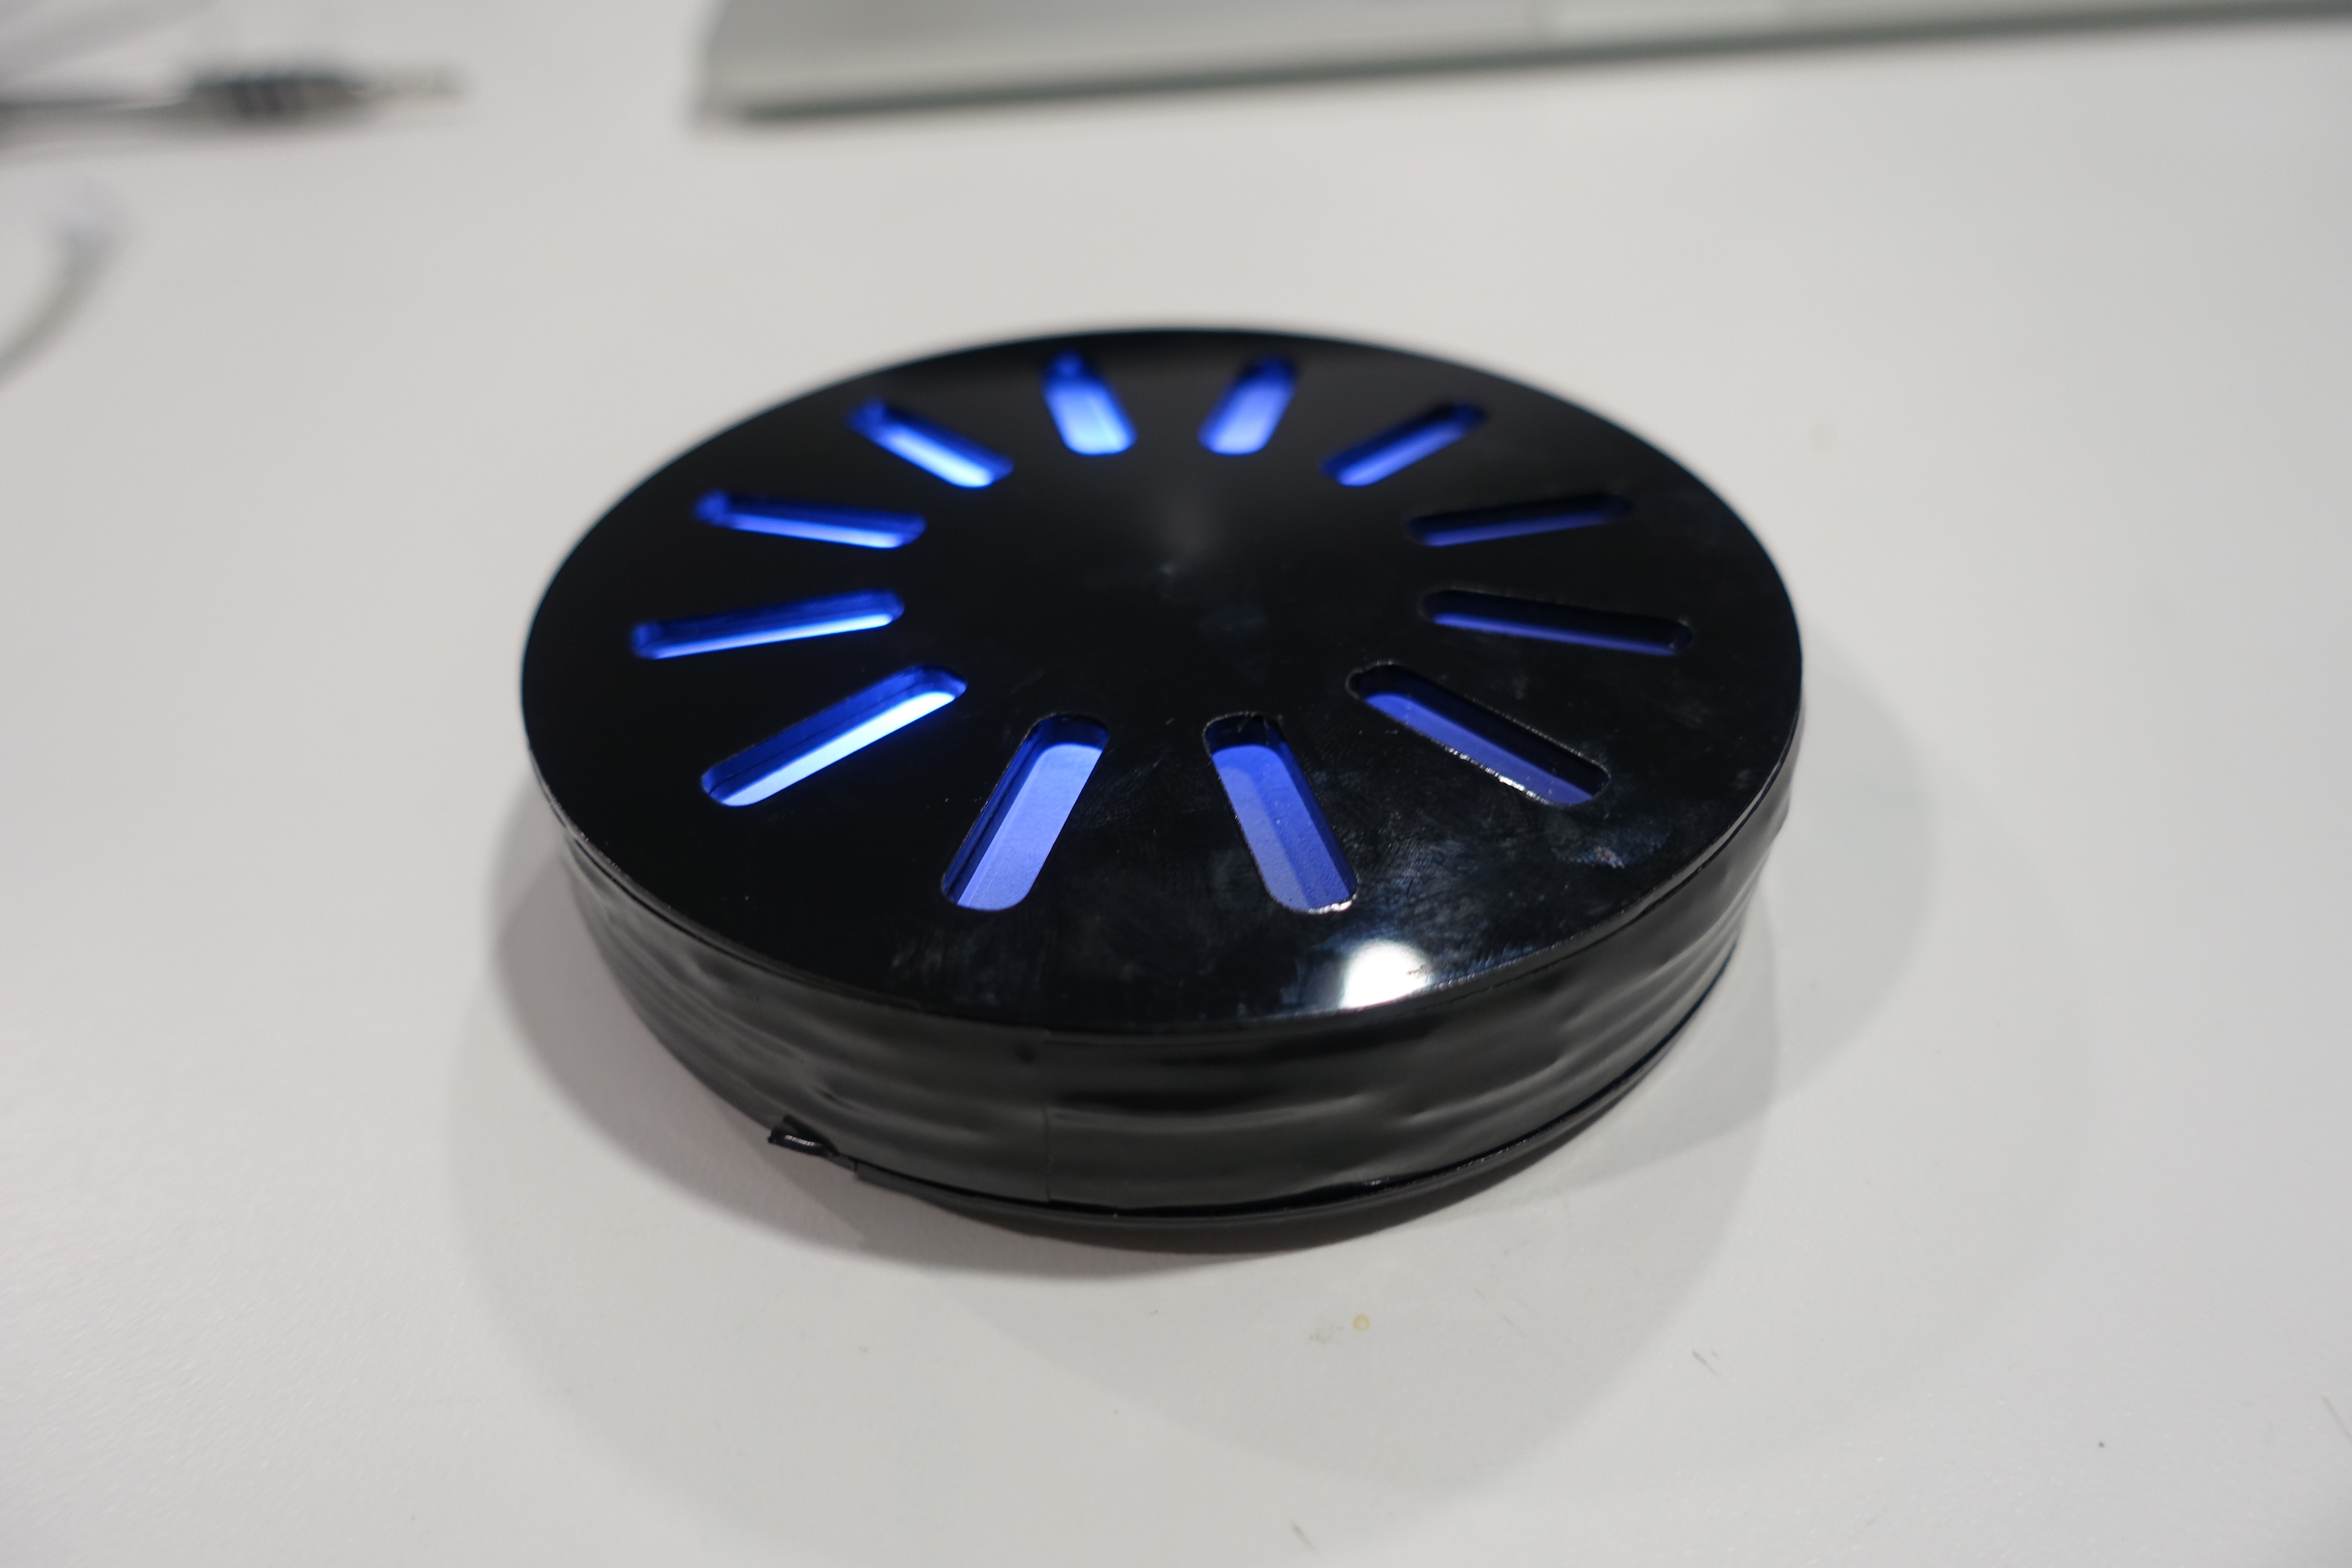
I am bring Loading Wheel to real-life!
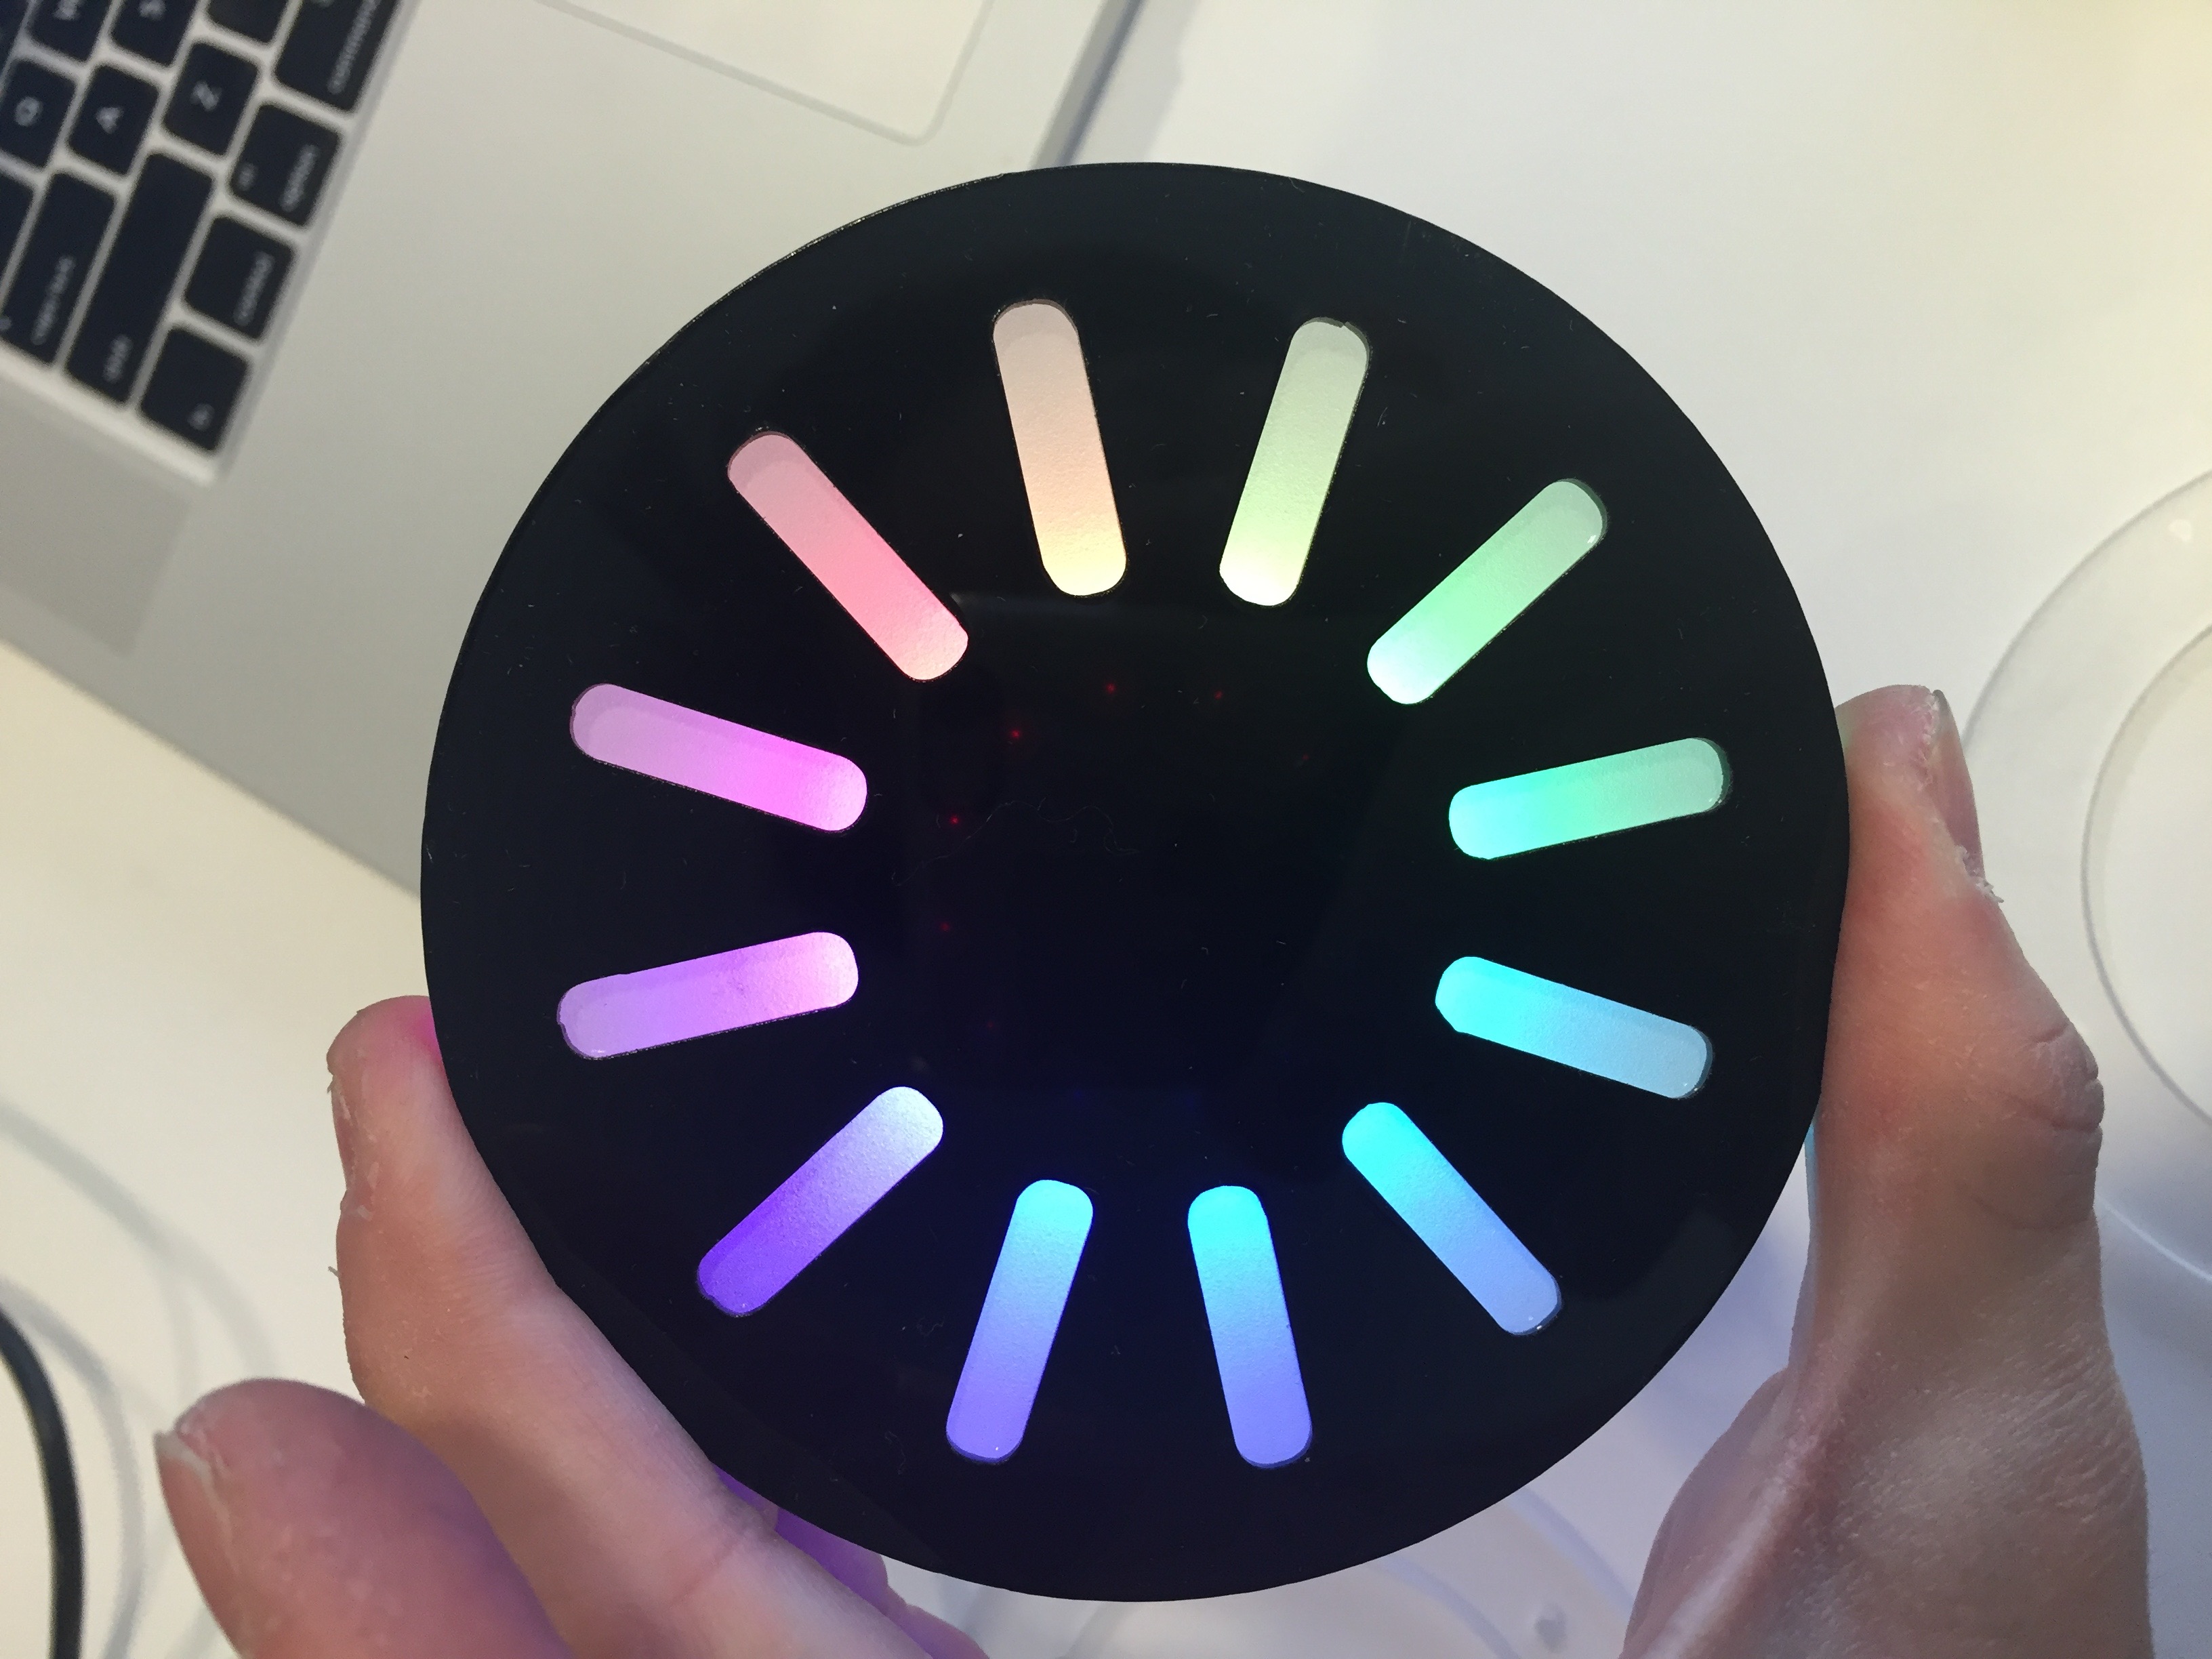
This is a motion deactivated loading wheel, when you stop moving the loading lights comes on. I found the spinning light to be extremely meditating in the real-life.
For this project, you will need
- Access to a laser cutter
- 1/4 “Acrylic Clear
- 1/8 “Acrylic Black
- NeoPixel Ring from Adafruit, or individually addressable RGB LED
- Accelerometer, analog
- Gemma or any small Micro controller with at lease 1 Digital Pin and 1 Analog Pin
- Small Lipo Battery, I used 150 mAh
- Some wires
- 4 1/8 Screws
Step 1: Laser Cut + Sandblast + Fitting

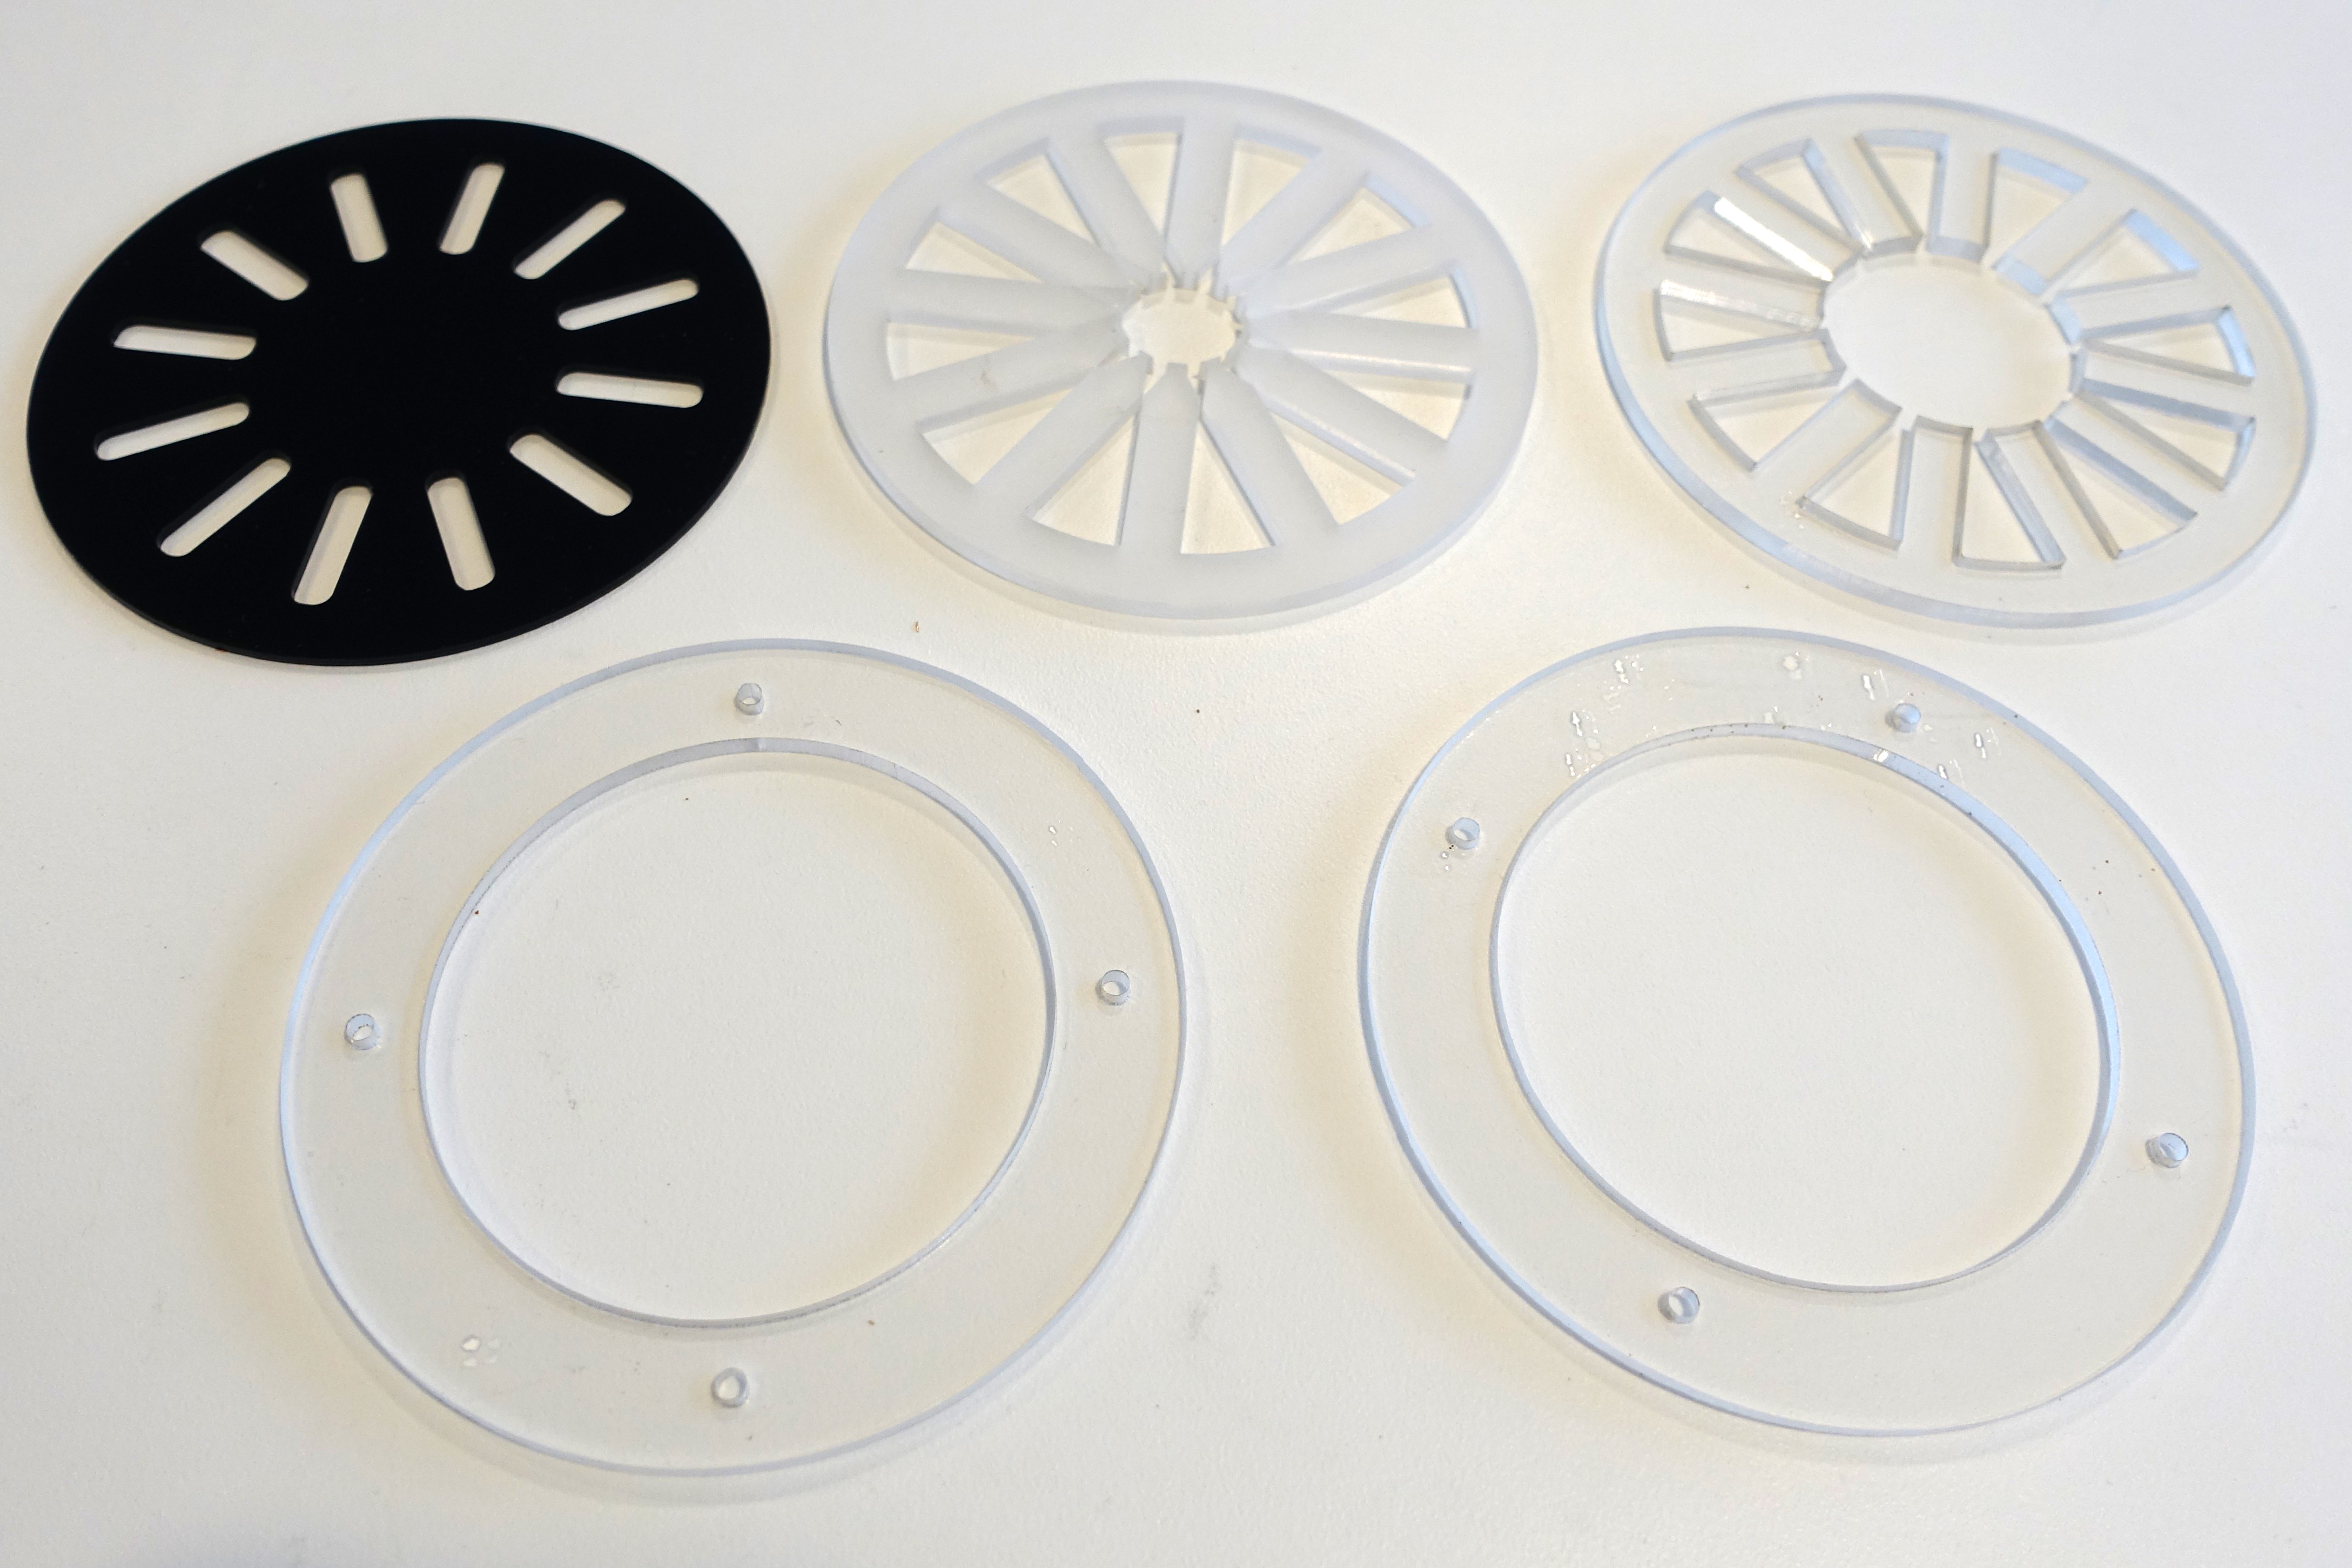
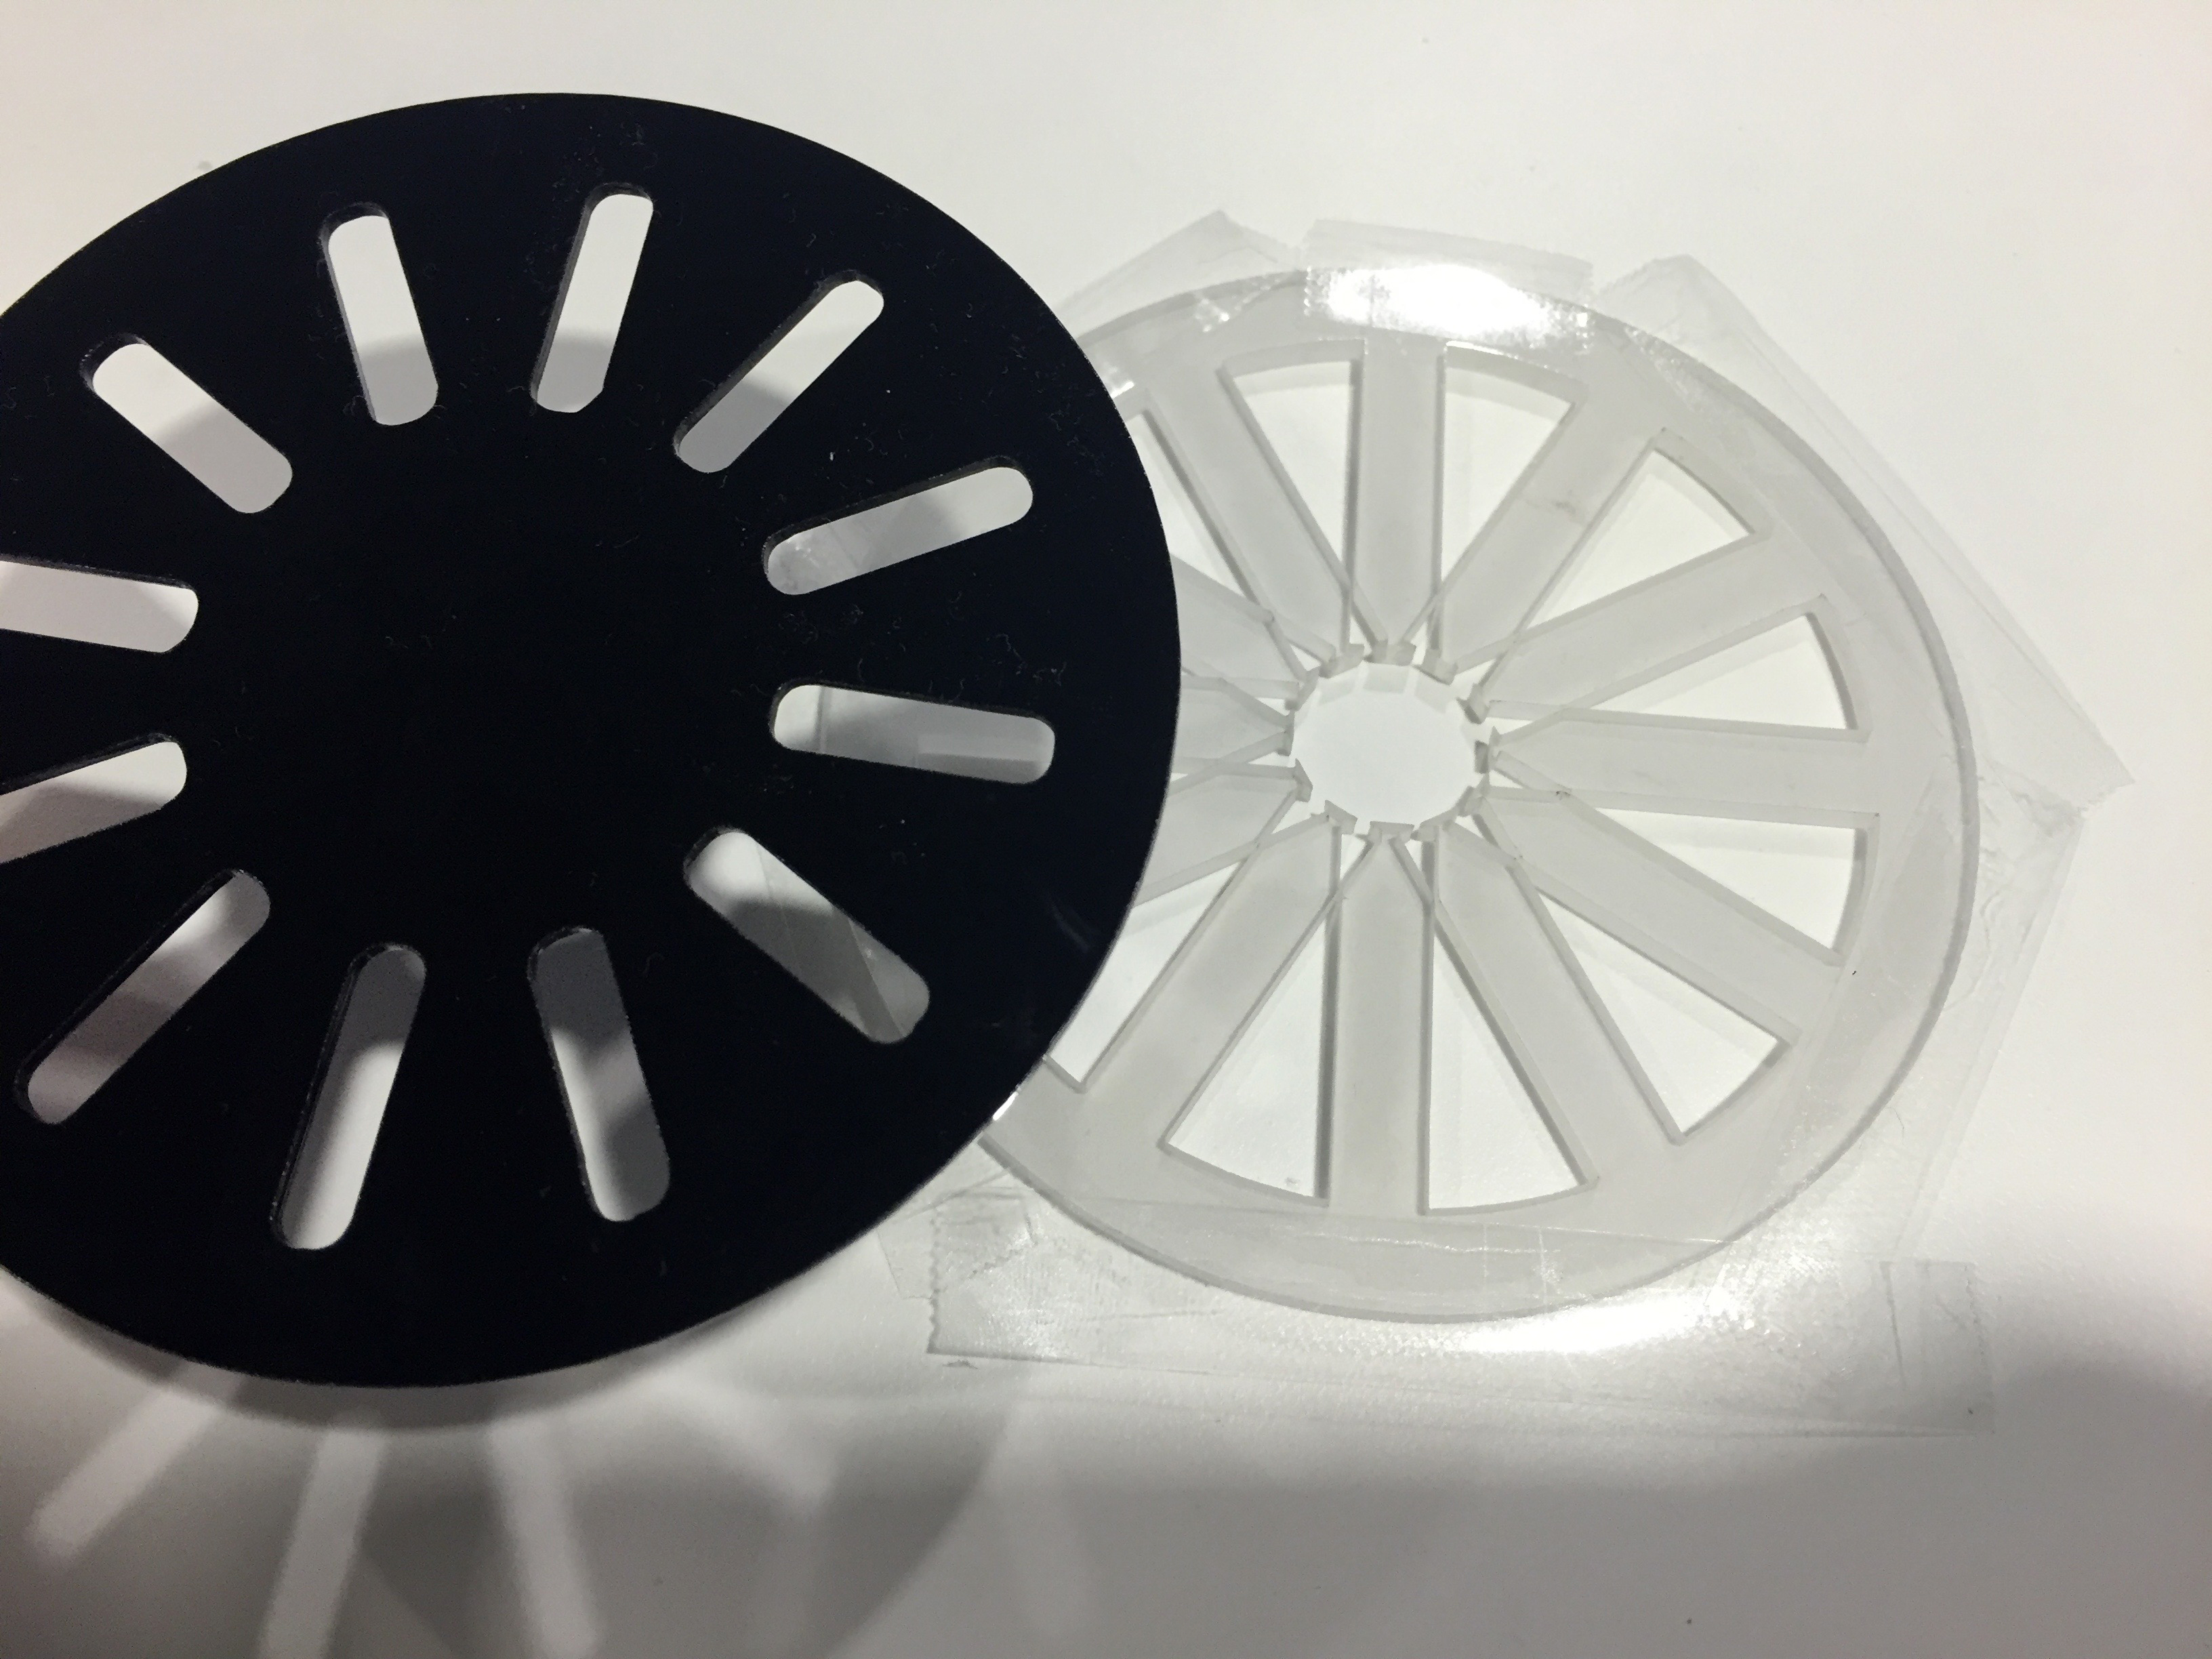
First, we need to cut some acrylics.
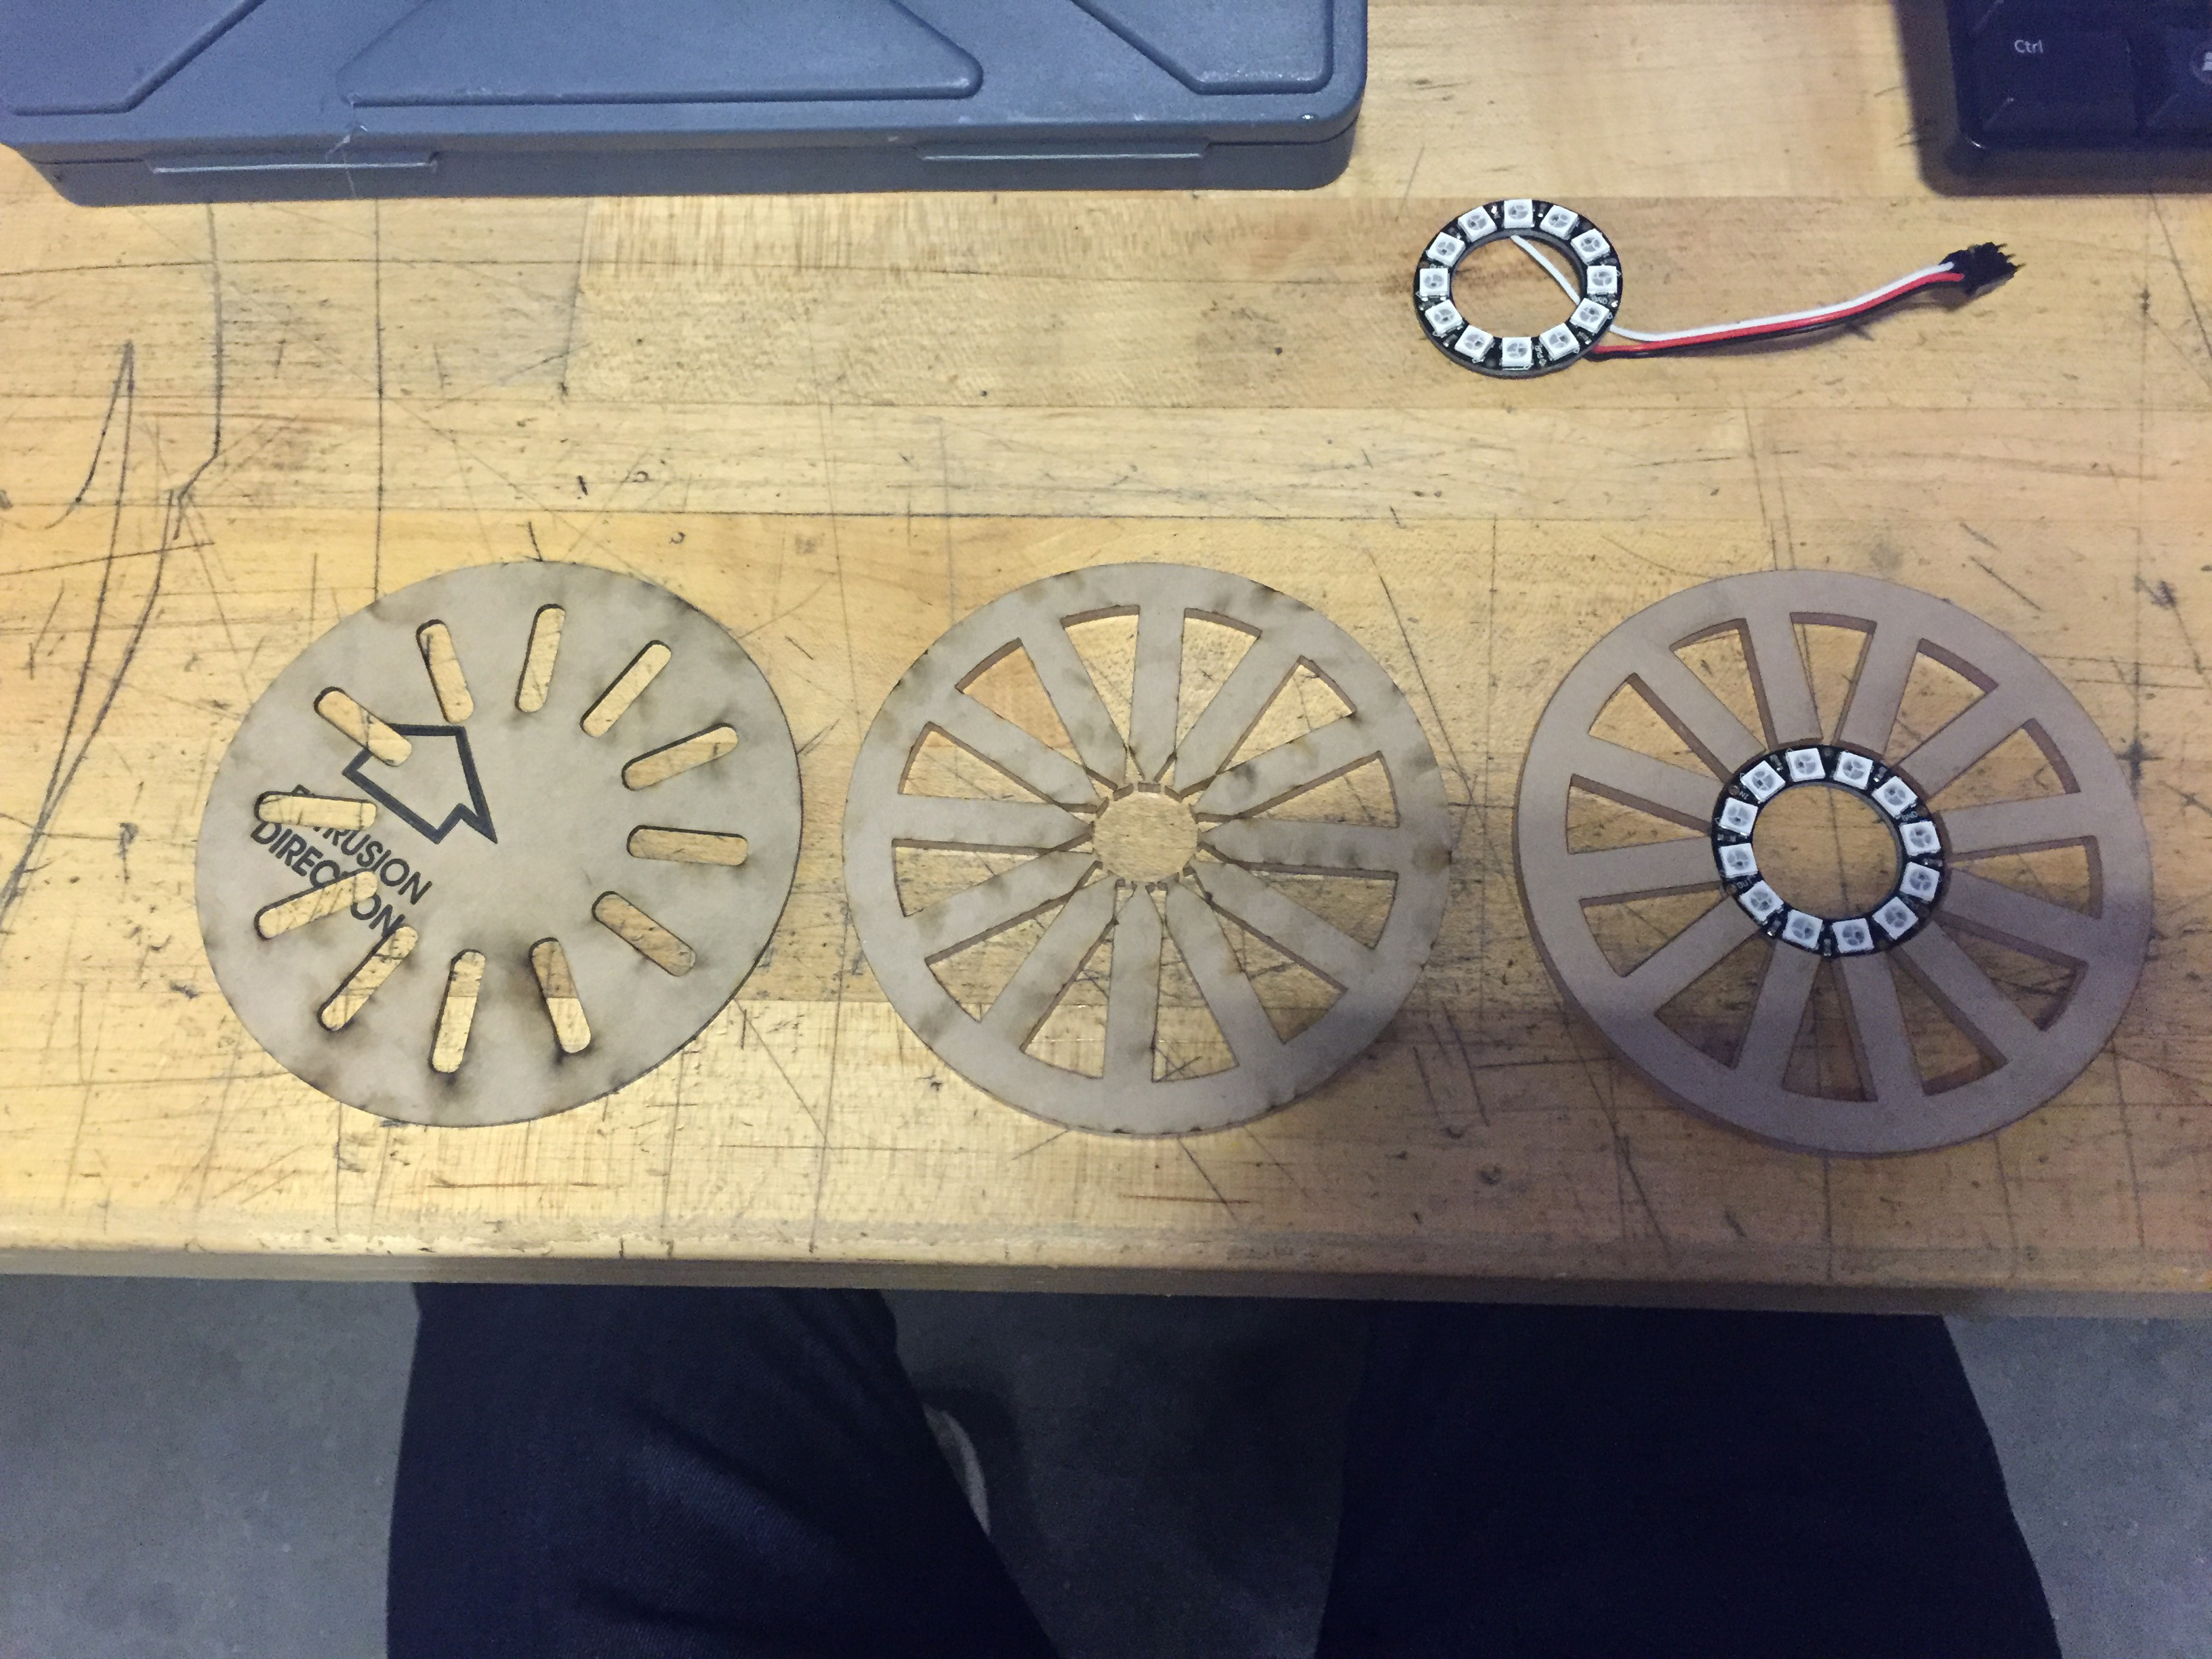
In the cut file you will see 6 circles
- The front Disk – Black Arctic
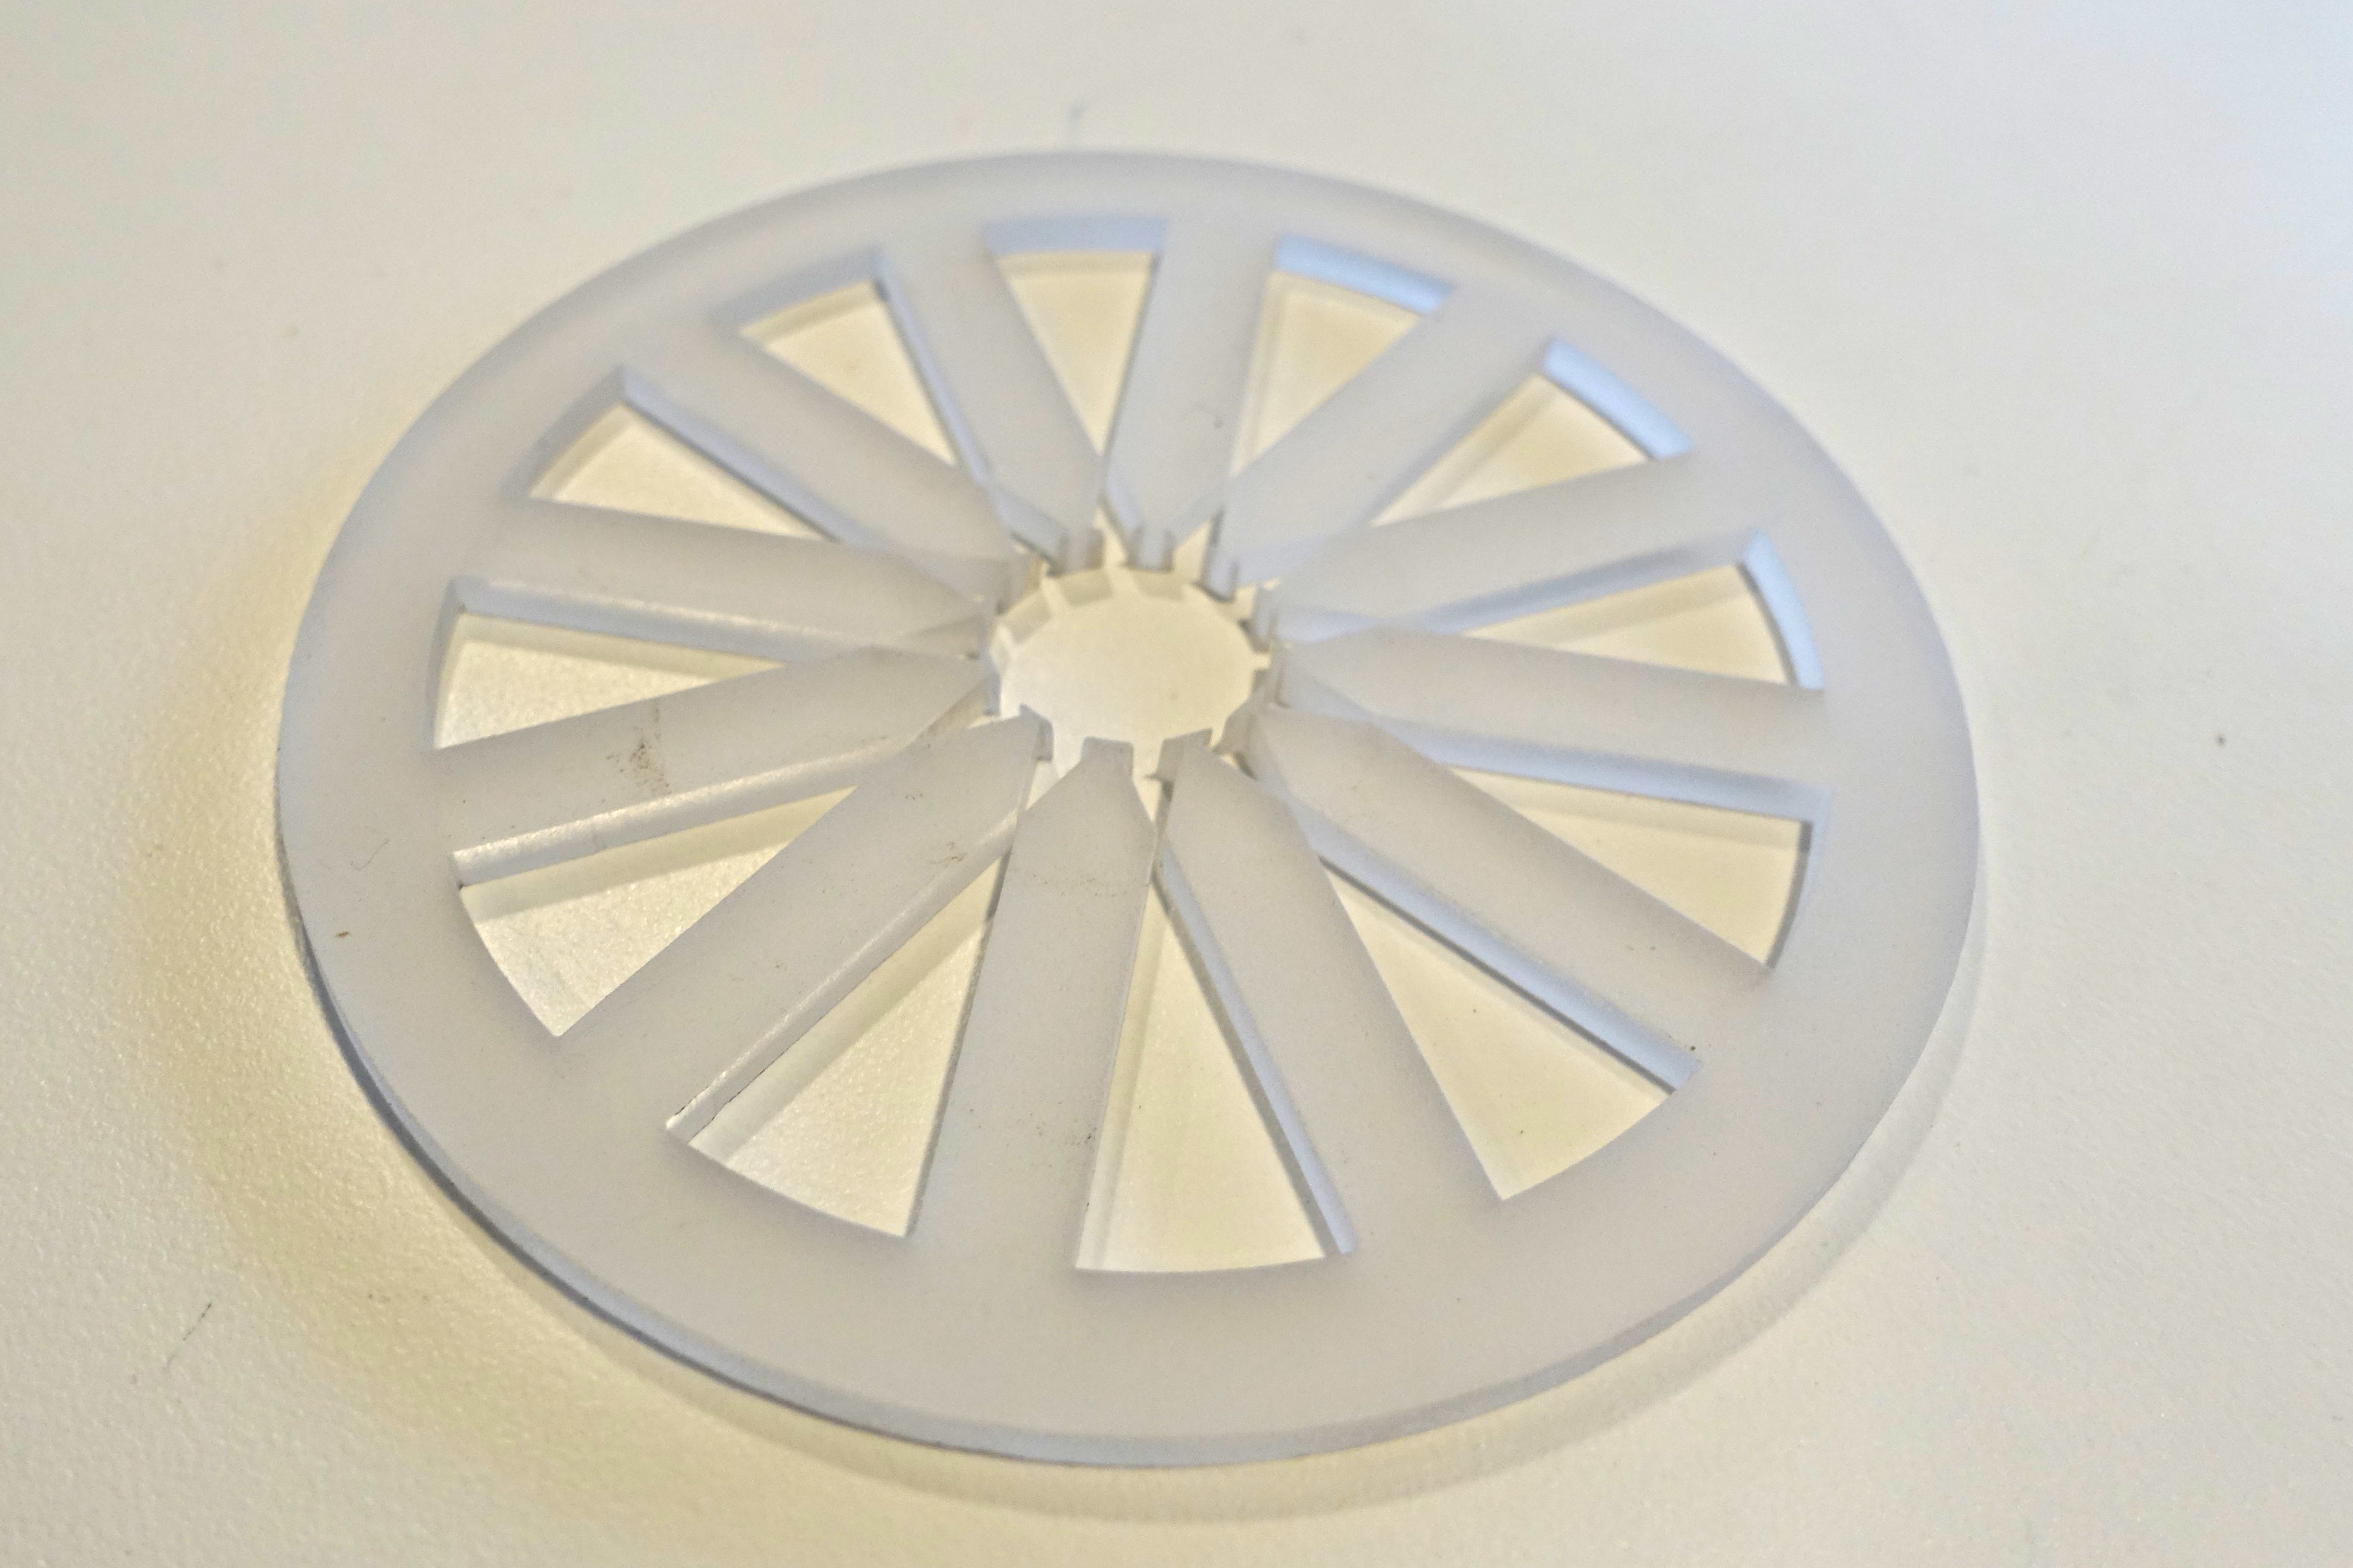
- Light diffuser – 1/4″ Clear Acrylic
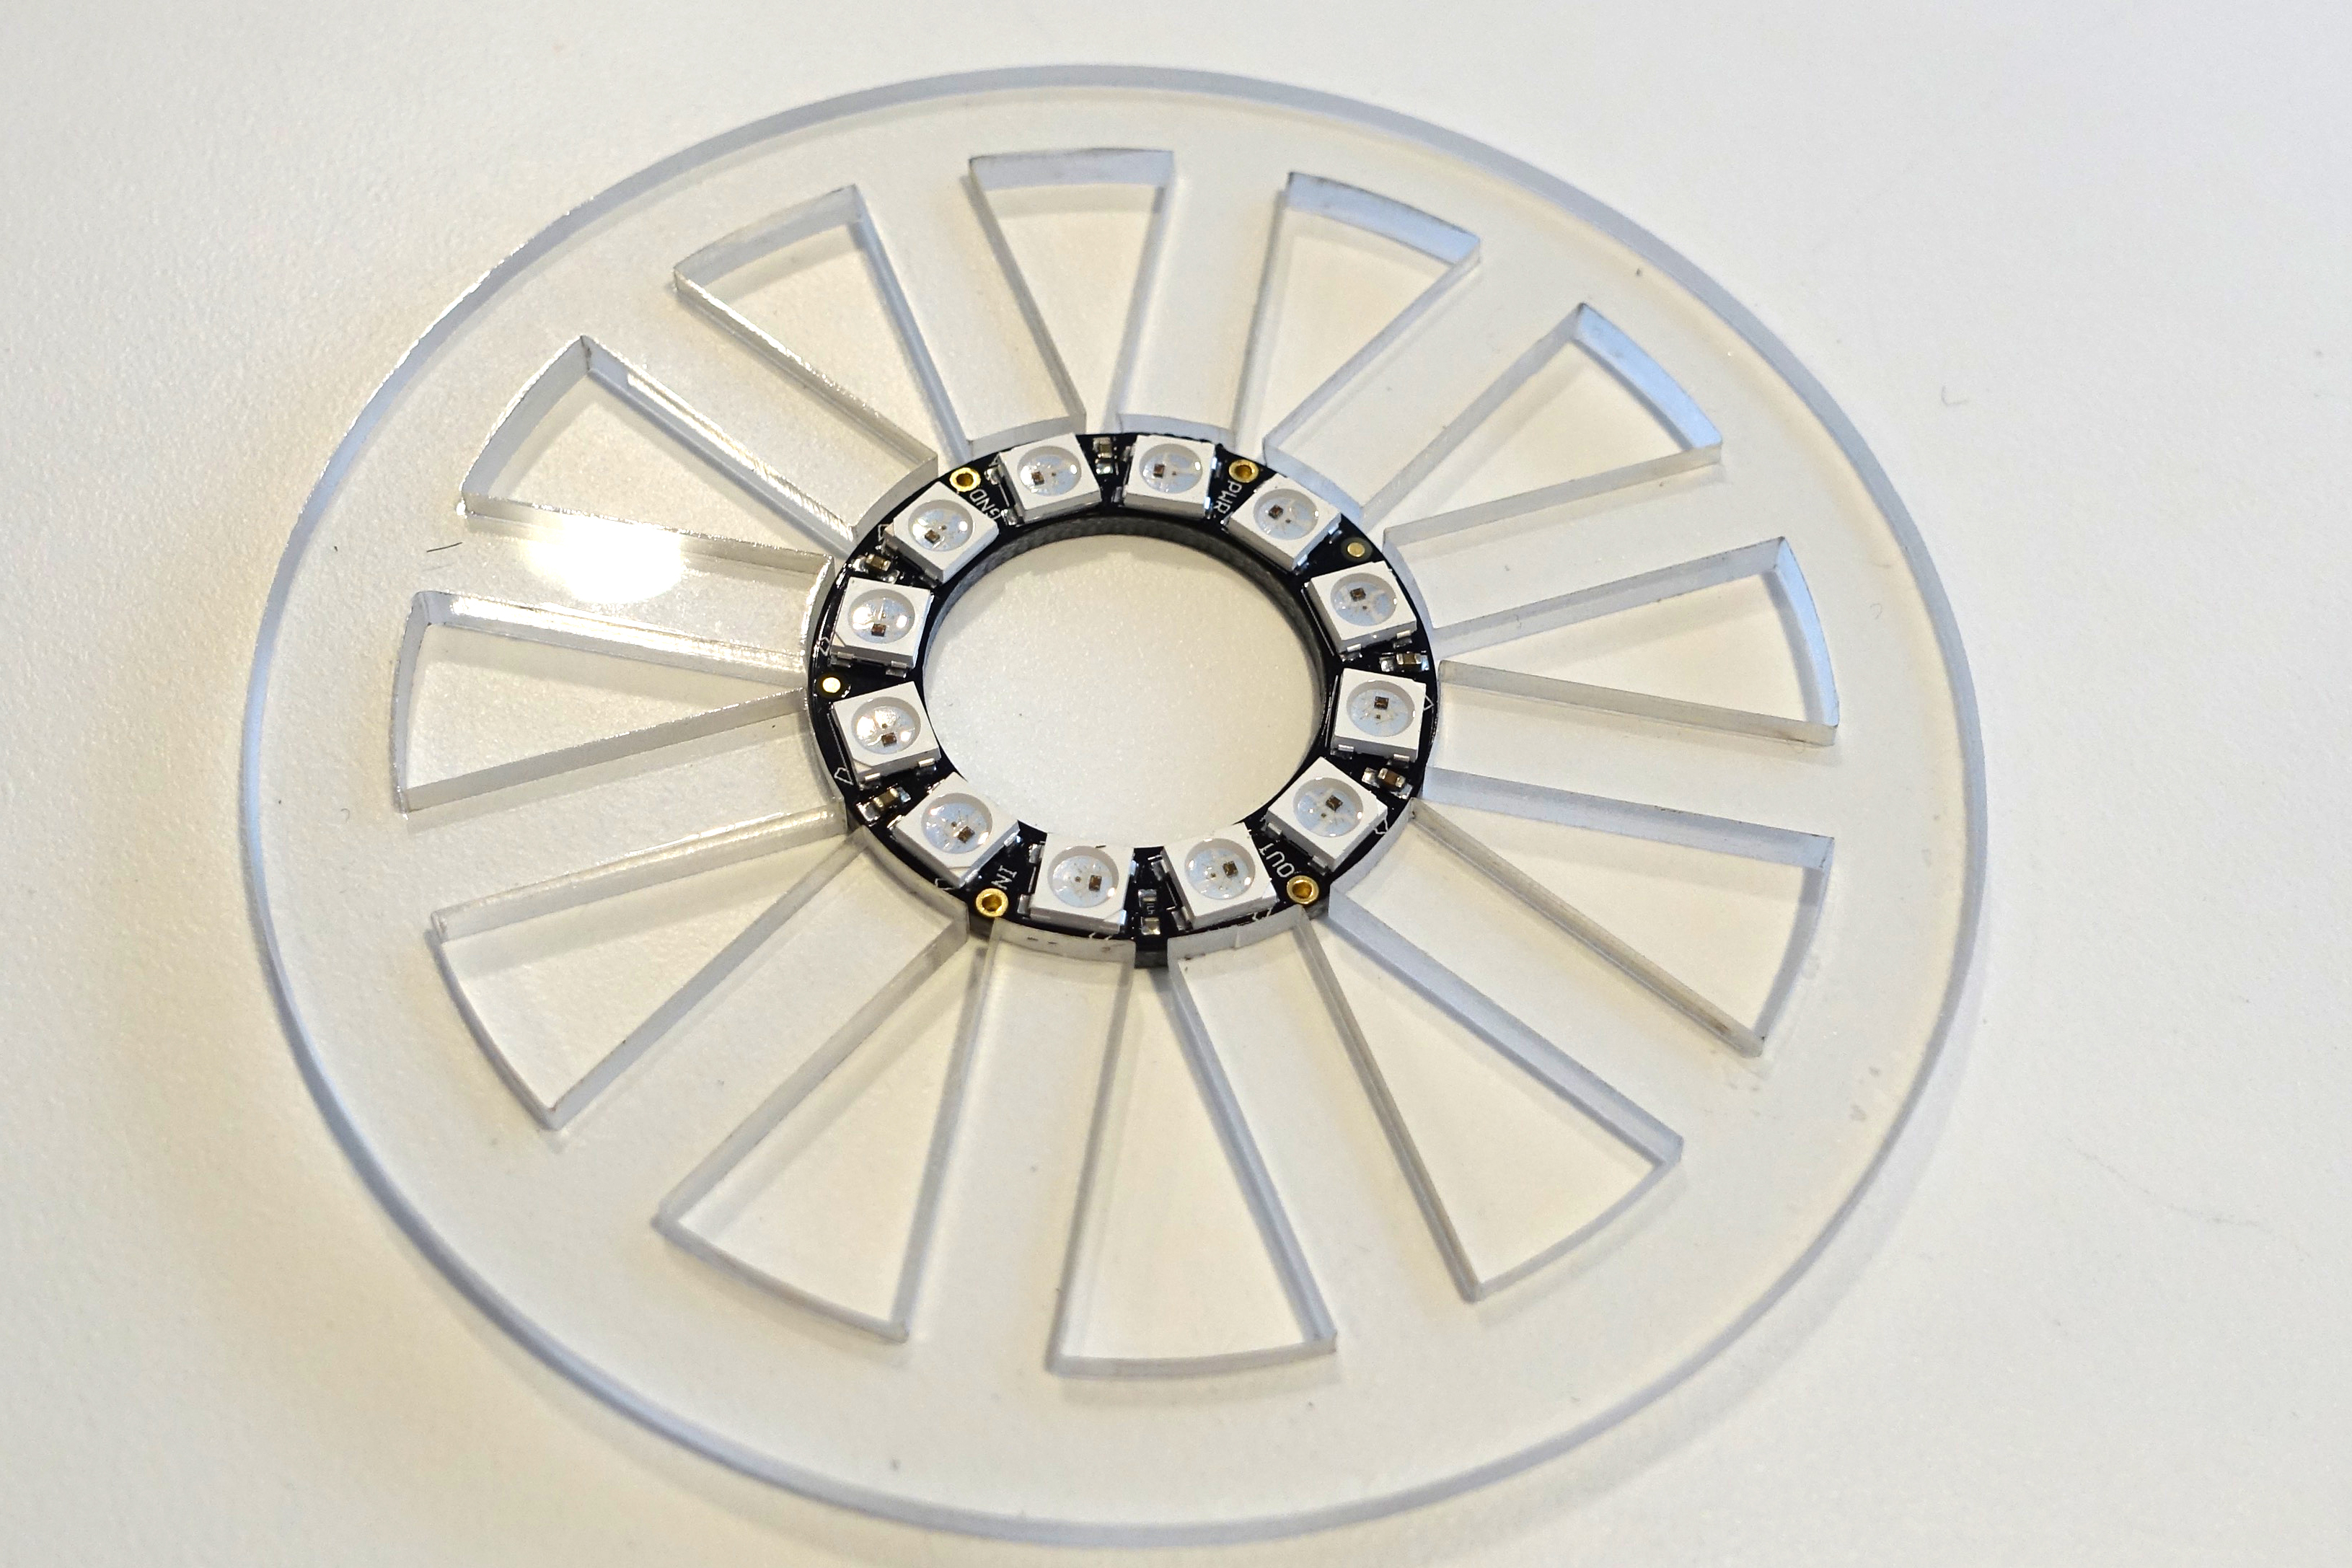
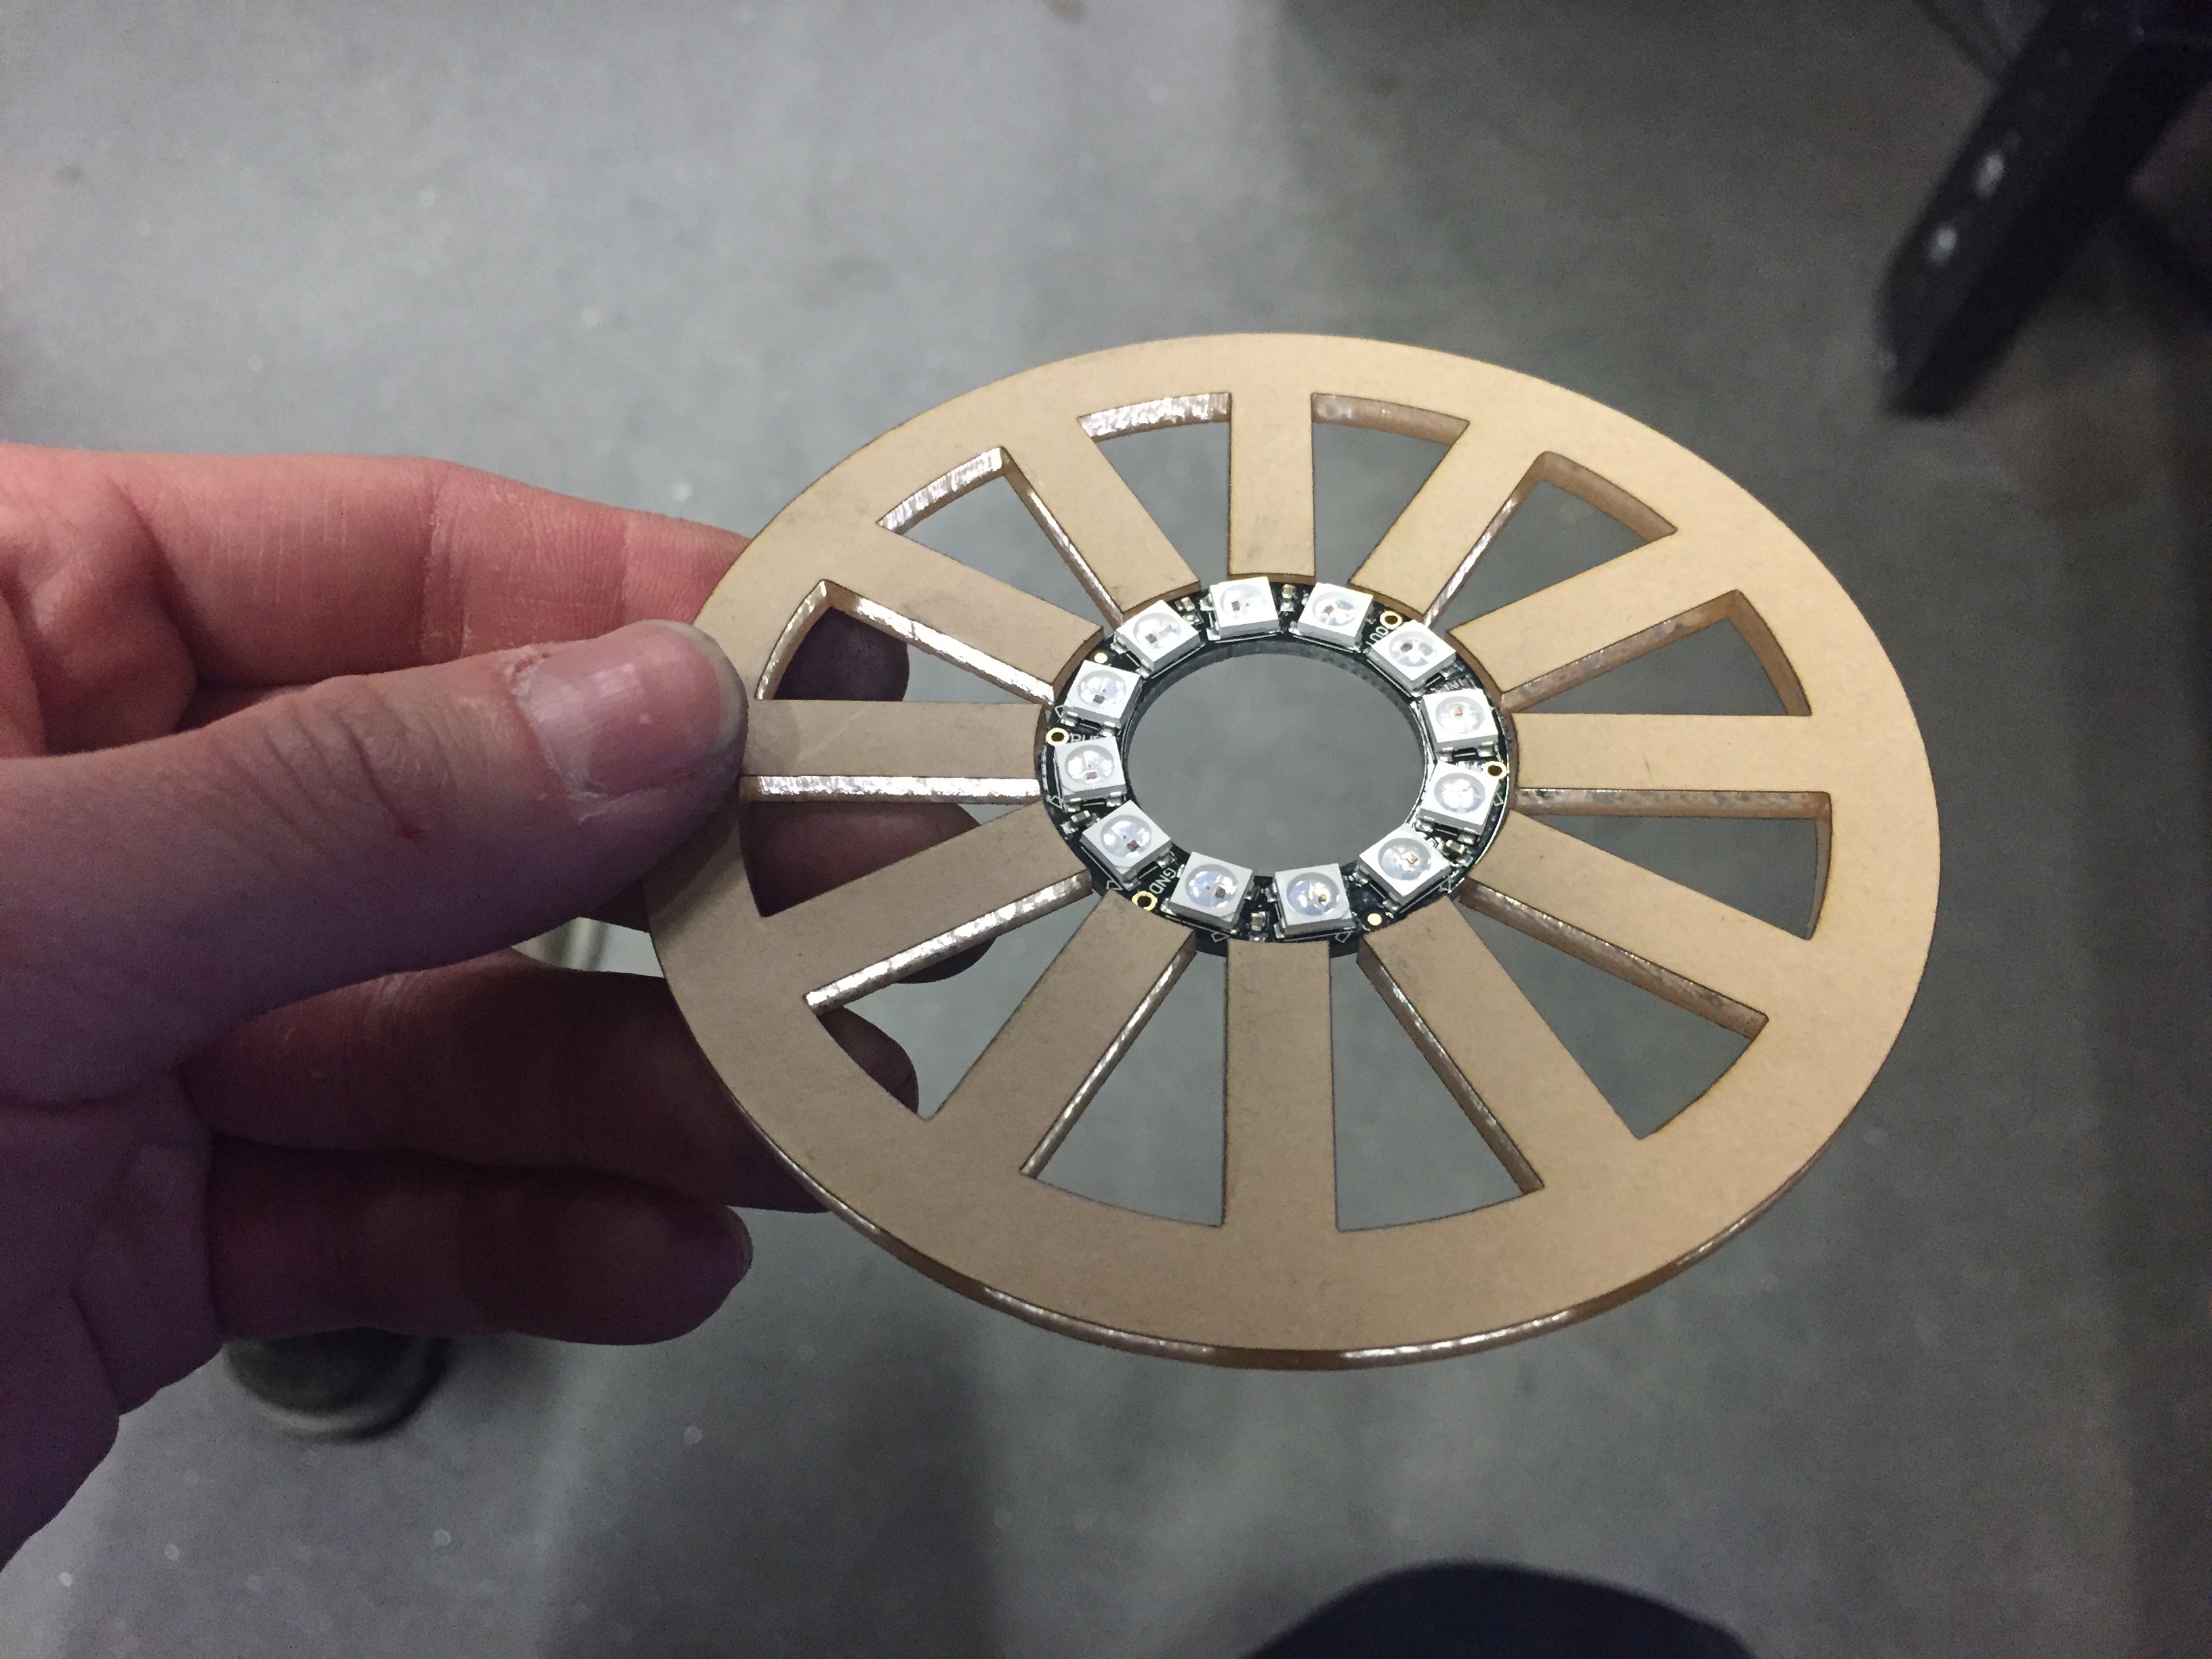
- NeoPixel Ring Holder (12) – 1/4″ Clear Acrylic
- Electronic Housing – 1/4″ Clear Acrylic
- Electronic Housing – 1/4″ Clear Acrylic
- Back Cover – Black Arctic
Make sure your NeoPixel Ring fits tightly.
Take sandpaper or better yet, sandblaster to blast the surface of #2, light diffuser

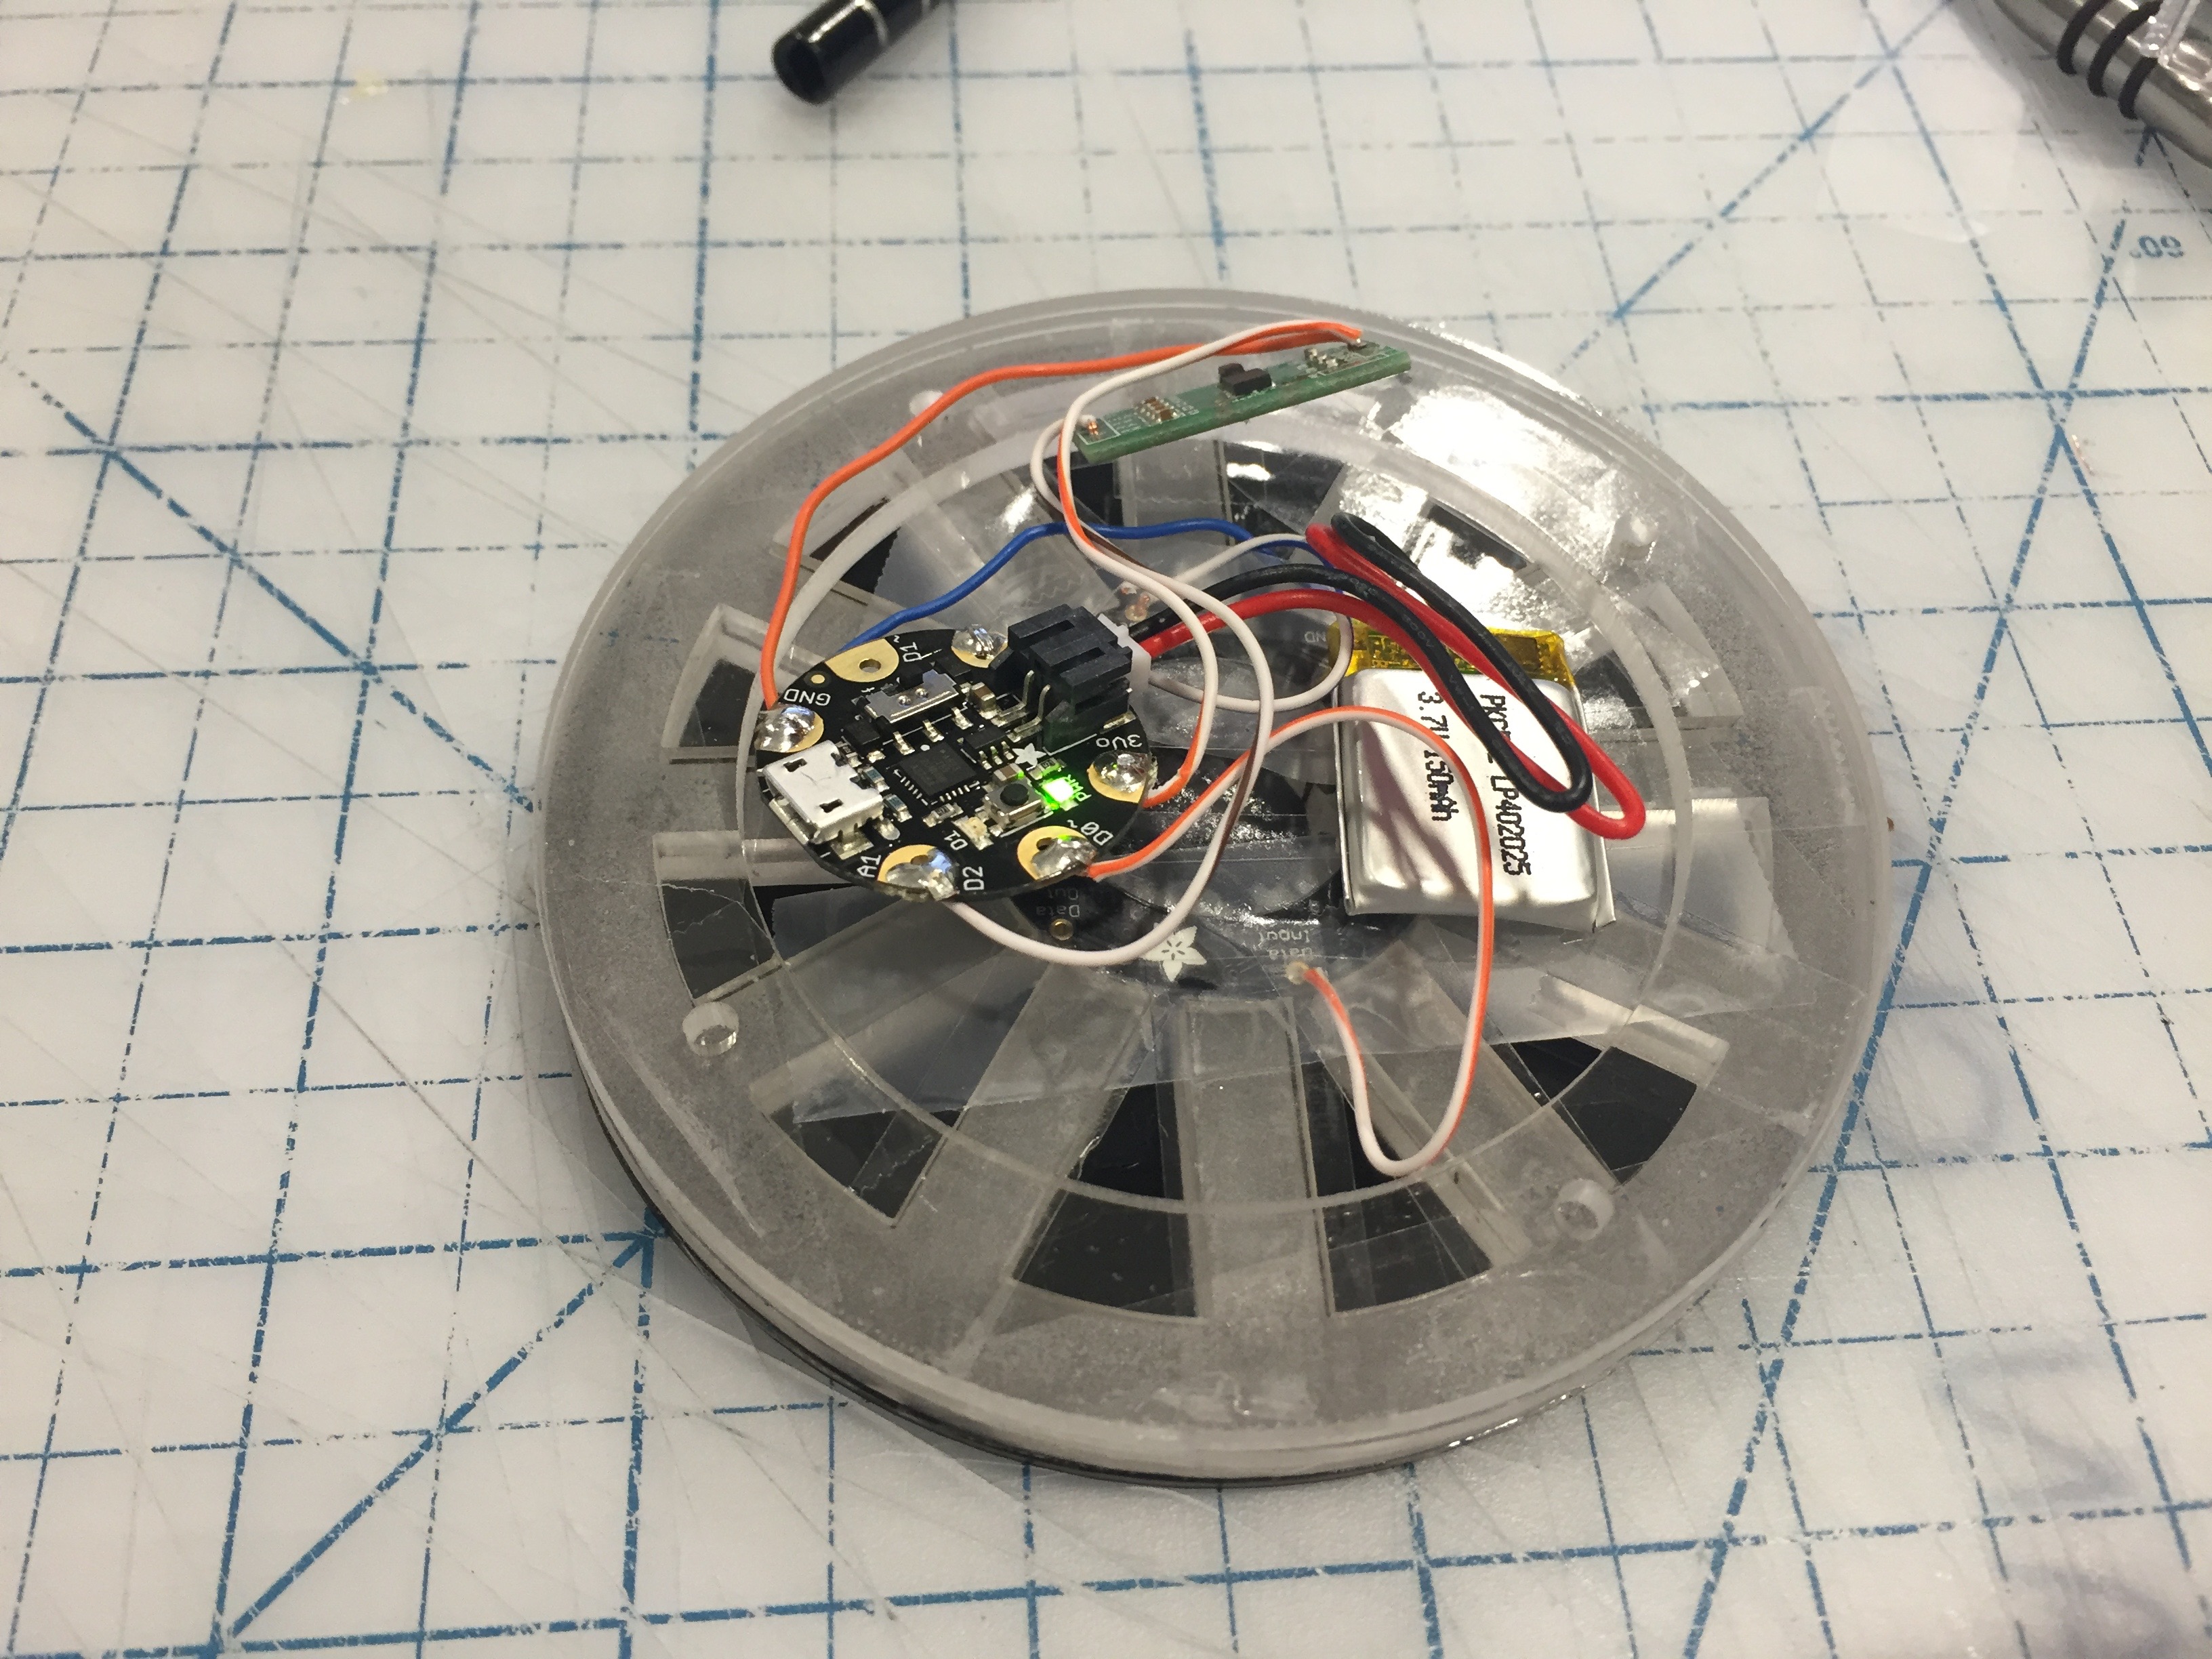
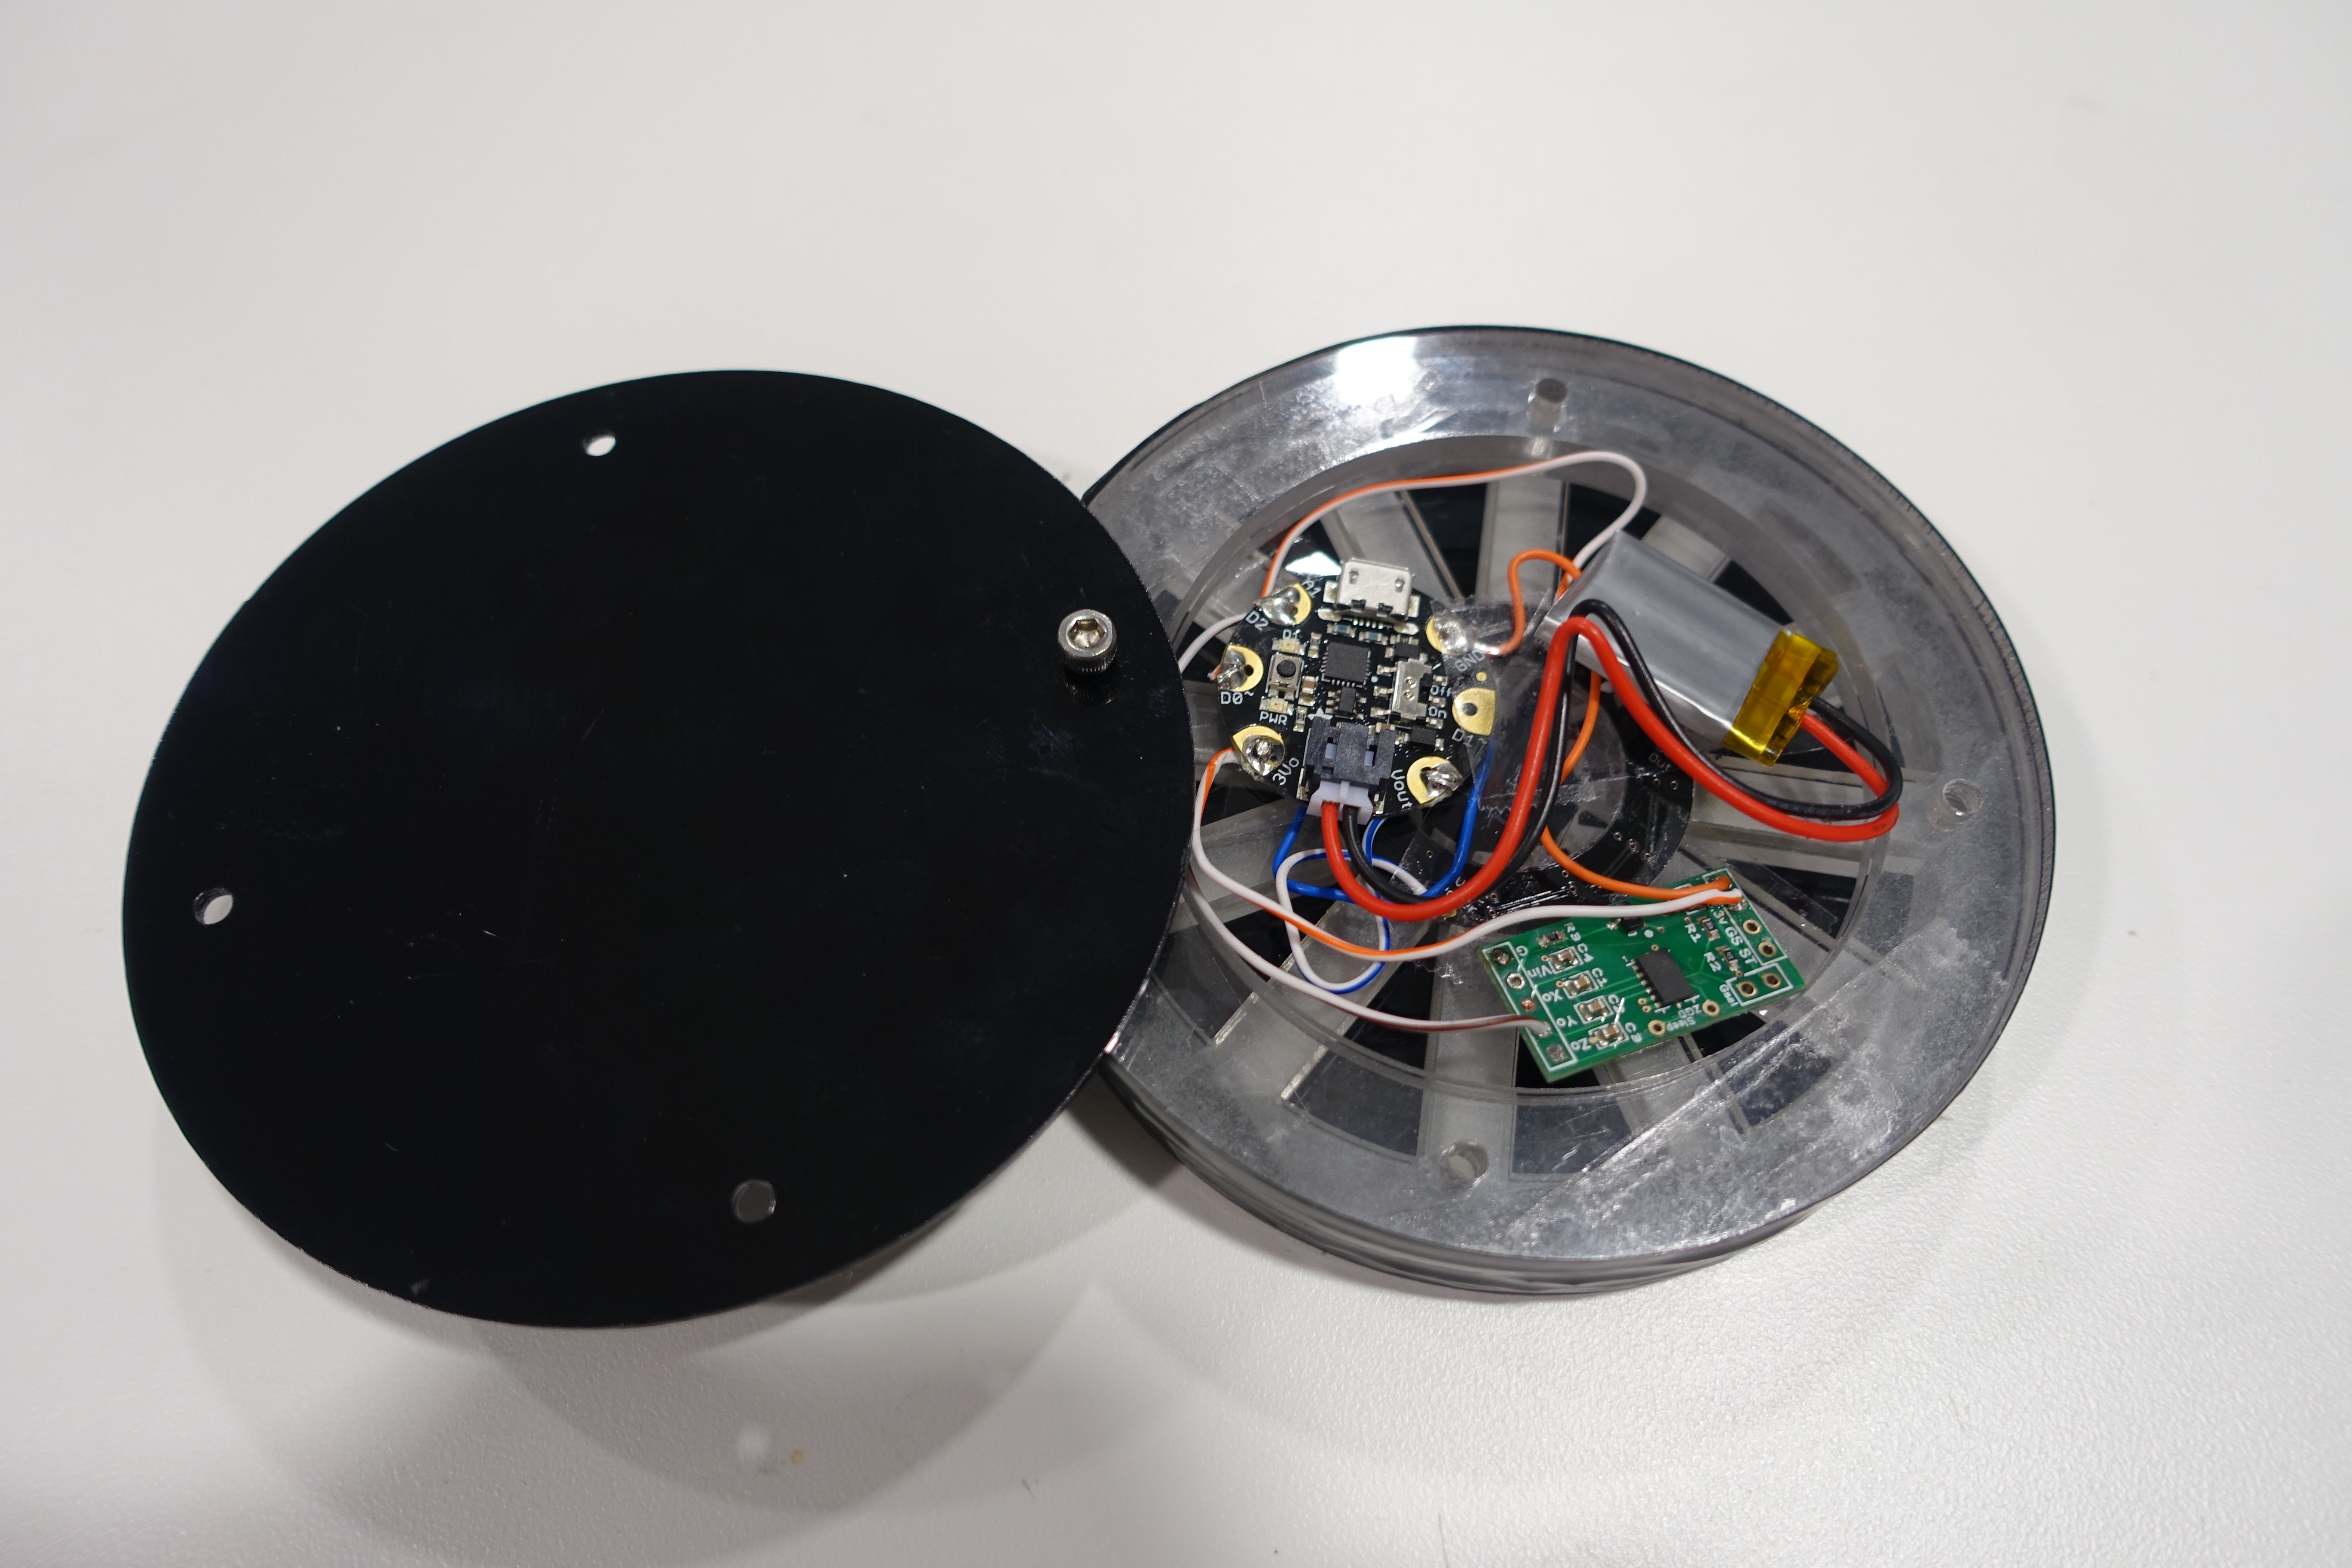
Step 2: Assemble Electronics
I use 3M double sided tape to tape all layers together, from layer 1 to 5, layer 6 can be screw on.
Everything should fit nicely in the housing area.
Connections
- The Gemma comes with Lipo battery jack, which makes it easy to assemble.
- You would connect Neopixl’s Data Input to Gemma’s D0
- Connect Neopixel’s GND to Gemma’s GND
- Connect Gmeea’s Vout to Neopixel’s 5V DC Power
- Connect Accelerometer’s GND to GND, VCC to 3V
- Connect Accelerometer’s X, Y, or Z pin to A1 (You can play with the position by charing the pin )
That’s it for wiring.
You can close the housing with 4 screws and attach a string to make it wearable.

Step 3: Programing
Below is the Arduino Sketch is based on Neopixel’s library. You can have it in rainbow color or different pattern when “deactivated”